News - Ultimate Warzone 2 Zombies Solo Dark Aether Guide: Unlock All Rare Schematics Easy. Tier 5 Elder Sigil

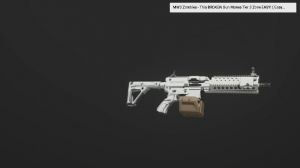
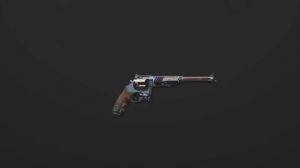
As a solo player the tier five dark EA with the Elder sigil is the hardest area in all of Modern Warfare Zombies I'm going to show you how it can be one of the easiest getting all of the classified schematics in one solo run including the escort contract let's first begin with the solo load out the primary weapon is going to be the meta Loadout right now in Zombies the tier pistols and you're going to need them a Kimbo with these attachments, you're also going to want to have decoy grenades fermite grenades and the energy mine as your field upgrade and you're also going to want to have at least one legendary EA tool so you can UPG tier pistols to Legendary Rarity and complete enough contracts in game to get it triple papped or bring in a crystal The true secret weapon for the dark EA is going to be the VR1.
You can get as a weapon case from taking down the act for worm or the red worm World boss and that is because the vr11, has a secret ability where if you shoot it when pack-a-punched at the ACV, escort, it actually heals it to 100% Health before going in you will of course need an elder sigil you'll need at least three self-revive, kits in your large Rock sack and the rest filled with LT 53 Kazmir grenades you will also want to have one sentry gun as your kill streak and you can also take in these three items but they are not necessary they'll just make your game easier which of course the golden armor plate the EA blade and the dog bone you can also get a friendly dog from tier three and then you can bring it in so now we have ourselves set up let me show you a full solo live completion of all three contracts, so here we go ladies and Gentlemen Let's do this all on our own.

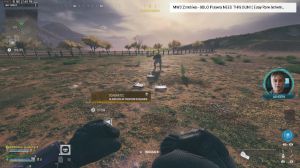
My first trick is going to be to use the dog bone to get a friendly dog. If you don't have one of these, it's not the worst thing in the world; it is still possible. But this is just going to act like a really, really effective monkey bomb at all times, so let's go over and activate the first contract.
So we're going to make this section left, and we're just going to push left on this pathway. We're going to run all the way up the stairs here. Then we're going to go ahead and use this repel rope to get up to the first sort of floor of the fortress because we need to grab this contract, which is quite high, and also because the vr11 is going to allow us to run extremely quickly.
Now, you probably already know why I'm running the vr11, but if you don't, you're going to find out why, because with this escort contract, it's almost impossible to solo. But when you run the VR1, it's suddenly like one of the easiest contracts to do, which is crazy, so I'm going to keep following it along down here.

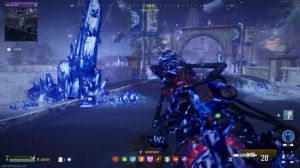
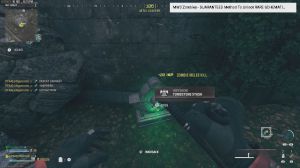
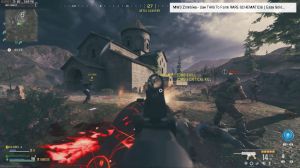
We're going to get to this section here, then we're going to drop down here. We've got our contract right here, so let's get up on the pillar, and then let's dive over and go to escort the ACV, but before we can even do that, we have a little bit of a problem—quite a big problem, actually. You can hear him stomping, and that's because we have a mega-abomination just chilling.
So we need to go ahead and take him out first. Now with the friendly hellhound, it's going to act a bit like a monkey bomb of sorts; it's just going to be attracting a lot of zombies, especially the Mega Abomination as well, in theory. You should be able to stay alive; you shouldn't die. You probably get damaged quite a lot, but we are absolutely tanking this guy.
ACV, let's go ahead and start it, and the moment we start it, we're going to hop on here and we're going to pop down our sentry gun. This is going to go on the back of it, and it's going to act like this crazy Sentry that's going to just make our lives a lot easier by taking out any zombies that are spawning behind us, which is great; disciples already have no disciples.

What the heck is just chilling up there? That's not cool; that's not nice. Any zombies that run in front of this thing should immediately just get crushed, which is amazing. Once we get around this corner, this is when we're going to want to start thinking about cooking it off. First. Casmir grenade, so the moment that we get to the stop here, we're going to go ahead and Chuck it down, and we're now going to shoot underneath here with our vr11, and that should give it a few seconds; it should heal it.
I'm going to cook another right there, so we go there, and it's back to full health, which is crazy. Like, tell me, is this not the most useful wonder weapon in the world for being able to do this? It's absolutely nuts, and there we go. That's the first one done, and we can keep on moving. That dog is just doing so much work for us to be able to just attract the zombies and keep them away.

Let's just get this again, so you do need to have the vr11 pack. punched if it's not packed. It won't do this trick. There we go. We got another megabomb coming; uhoh, no no, is complete as well. When you get the second megabomb, it can come at this sort of time; it can come a little bit earlier.
Get back up real quick. Holy guacamole, there's our first down, and that's great. I blame the megabomb for that. Let's chuck down another black hole. We could have done it a little bit later. I'm choosing to do this now. That'd be awesome. I'm going to go for a second, but we need to take this Mega Rob bomb out, but it's quite far back, so that's good.
Okay, put down another black hole, bomb. It's going to suck most of the zombies, and it's just this mega bomb that we have to watch out for now. Is he trying to take that? Take out the sentry gun. I really can't tell. We got a nuke; we grabbed the nuke. Yoo, there we go, and the mega bomb is gone.

99 Health makes this look really easy. Lads really easy; it's just going to keep crushing some of the zombies there, and how's our dog doing? Our dog is. I don't really know what he's doing right now; he's doing good; he's chilling there; we go; he's at like 70% health, which is pretty dang good, so we should get another Mega AB bomb coming really.
Soon there he is, so he's just chilling around that corner, so you can get between two and three. We got really unlucky with getting three of them in, Lord. Oh, Lord, let's not take it. So when you get to this part, this is where it's really going to test everything, from the health of it. We down the energy mine.
Lord, you don't really need to worry about anything, like we can put down one more black hole to be on the safe side. Now all we're looking for is just to hear this sort of Origins warning sound, which means that the rocket is about to launch, and as long as we keep this above 50% God, as long as we keep it above 50%, we should be good, and there we go.