News - Ultimate Red Worm Guide Solo Friendly Defeat Greylorm (warzone 2 Zombies) Mwz #callofduty

Sup folks, Ray Potter is back with another Modern Warfare 3: Zombies article. Today, I have the ultimate guide to defeating the red worm. As always, it's a solo-friendly guide, and chapters can be found in the description as well as integrated into the article.
Overview

The red worm or grey LM is just like the Act Three and Four worm bosses but with more health, and the fight takes place in Ukhan. To spawn the worm, you must find four USBS from around the map by activating UAV towers.
The location of these towers changes from game to game. To find out where they are in your game, you must go to one of the four control booths and look at the images on the wall. Once the gas reaches the battlefield, you insert the USBs into the four devices and make alarm sounds, and they summon the beast after 1 minute.
The battlefield is marked by the presence of two Ammo Depots close by to each other. The boss's health scales with party size, so actually not joining up and having many small squads is the best way to speed up the boss's fight. As long as you damage the worm even a little, you will get a reward Rift upon defeating the boss.
I tested the solo with a separate team of five or six barely firing half a clip into the worm and then focused on crowd control, and I still receive rewards. By defeating the boss, I drop some high-tier loot, much like the Act 4 worm, and inside the reward Rift, you will get one of the three new non-classified schematics.
They are the scorcher plans, the triple-pack Crystal plans, and the legendary ether tool plans. The first one you get is RNG, but having a large crew increases your chances of hitting what you need, as people who already have them may drop the plans for you. If you ask on top of the pile of loot and reward Rift, it spawns a portal you can exfill.
Usb sticks

From there, go to one of the four control boosts and look at the images on the wall, take a screenshot, or just remember your four locations. I used the cheat sheet on the screen when I first started. I've added the missing one in as well on the one on screen.
You can also use the interactive map on the WZ Hub. For this to get more precise map pings. If running co-op, you can split the towers up and each hold a USB or two to have as much room in your backpack for helpful loot for the boss and to be more efficient with At this time, you can also think about tombstoning and grabbing the USBs in a separate game than the one where you attempt to defeat the boss.
Setup

This will allow you to have an extra game to earn cash as well as give you a full match to build more cash and resources without having to worry about the USBs. I highly recommend Tombstone or Xville. If the gas is too far from the battlefield, especially for solo attempts, the further it is from the battlefield, the less time you'll have to beat the worm, and you need all the time you can get.
Solo, if the gas happens to be right on top of the battlefield, you may want to go ahead and take out the storm caller for the battle. If someone has a TFA, it absolutely destroys them. Toss a decoy and go to town. Tap two in purple, and it should get down fairly quick. If TOA is a noo, a purple or orange triple-pack gun will do the job; dead wire will help as disciples are weak to electricity.
You can just take them out from outside the gas station at a distance. Don't forget to check out the pile of loot the storm collar drops before you go. Also helpful for solo runs is if you get lucky and get the Battlefield spawn in Tier 1. This makes the zombies and mini bosses easier to dispatch as the gas only raises their level by one, so they will be tier 2 as opposed to tier 3.

For solo, I recommend bringing a legendary tool and a gun with great mobility and damage. Right now, the best option seems to be the Aikimbo WSP Swarm. These are great for handling the whips and allow you to run and have a heavy secondary weapon. For secondary, I suggest either an RGS L Wonder WF or an orange full auto weapon from the wall in Zone 3.
The Hogar 556 is probably the best option, but almost all the ARs and LMGs are viable. Options: obviously, the gun you're using to kill the worm should be triple-packed and as rare as possible. For solo, I also recommend running an ether blade and golden armor. Having a dog can save some self-revivals and distract zombies and bosses.
Dog bones, either blades or golden plates, are all gotten from the dark ether, so go in and stock up before your red worm runs. You need help mastering the dark ether. Check out the guide on screen now. Decoys can also be good to have to keep the zombies off you while you fire away, and experimental gas grenades do pretty good damage to the worm and will cause the worm to resurface when.

Tunneling, sentry guns, and air strikes can help manage the zombies and mini-bosses. I've heard that having more than 30 sentries out can make the game unstable, and C is more likely, so keep that in mind if there are a lot of people fighting the boss. If running Co-op, a triple-packed orange wall bum and fist for running work fine, as does having golden armor.
The Ether Blade and a dog certainly help, but they aren't 100% necessary. Having a durable gas mask is vital; I like to even buy a spare. Sometimes the worm will eat you on the way to hit an Ammo Depot to repair it, and it cracks before you can get there. The rest of your backpack space should be self-reviewed in Co-op Running Healing.
Aura can be very clutch and can help save revs for solo energy. The mind can also help with zombies and mini-bosses. An ether shroud can give you some extra time to blast away at the worm. If you don't have golden armor, the frenzy guard can help with armor, but that and healing auras refill very slowly.
If you are running solo, I recommend looking for Tier 2. Buy close to the battlefield, bring a car to the fight area, and once the gas covers the devices and you put all four USBs in, hop in the car and hit the shop for more revs and/or kill streaks, then book it back for the fight. If you get to the stadium, Battlefield, make use of the bleachers.
The zombies and bosses will take a while to climb up, and it will help keep them in your field of view.
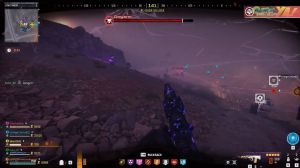
Boss fight

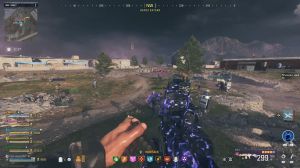
Sendries work great up here; it can be a little finicky to place, When the worm is about to spawn, the alarm will get more intense. The zombies will group up over where the worm spawns. Get ready to fight when the worm spawns. If you have gas nades, toss them at the critical spots, and blast away with your Pap 3 weapon if you're solo.
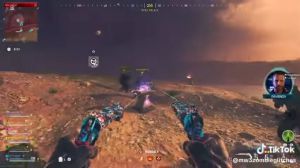
Staying on the move is vital. Toss decoys away from you to distract zombs, The worm has five attacks. Wisp the laser hulk, smash the gas spit, and tunnel. The wisps and the tunneling are the only times you should stop firing at the worm. Time is the enemy here, and the more time you spend shooting at the worm, the better when the worm releases wisps.