News - Solo T3 Infected Strongholds Made Easy - Warzone 2 Zombies #mwz #codzombies #callofduty

Sup, folks, it's Ray Hoop. In the third back with another cod zombies article today, I've got everything you need to know to clear Tier 3 infected strongholds regardless of stash or weapons available.
Setup

You can get both of these in the dark ether if you need help with that. Check out the GU guide on screen now. An added bonus to the Wonder WF is that it does not need to be packed to kill tier three through five zombies; the only thing the pack does is double the ammo size and make it a bit stronger against Specials.
Another reason to come and gear it up. The infected strongholds are first come, first served. If some hungry folks happen to be in your lobby, they may use crystals and tools to get in there and clear them before you. If you're trying to grind through the story missions, it can be wise to consider time your enemy.

That said, if you play a few games, you'll definitely get one in game, as many people are staying away from Zone 3 or just grinding contracts with no thoughts to strongholds. An option for crowd control is the RGL, which is easier to come by. All you need is an insured slot. This thing will do work; it takes out the assists and zombies fast with the splash damage and can allow you to camp the corners, making it possibly the quickest way to clear a stronghold.
It needs to be at least double-packed in purple to be sufficient, though, so if you have no tools, no Pap crystals, and no tombstone with cash waiting for you, it may be better to just do it all with an orange wall-by or box weapon. Now which weapon is up to you, but make sure it kills boss zombies fast, as you can face up to two mimics, a disciple and a mangler per stronghold.
So even if you have an RGL or Wonder W for the regular zombies, you need a strong weapon for the special bosses you will encounter too. Pick a full auto, orange, or triple packet. If you're short on cash, run Tier 2 bounties and deliveries until you have enough cash and head for Tier 3. Alternately, you can use an ether tool and your insured slot and bring in a meta weapon.

For ammo mods, I use brain rot when it's available. There are always two mimics, and they are weak to toxic damage. Plus, you have a chance of turning on special bosses, which helps fend off the zombies and is the quickest way to get past the specials. For perks, Speed Cola and Deadshot are the two most vital.
This will allow you to clear entire strongholds with just a bullet weapon. Jug and Quick Revive will help with staying alive. Make sure to have Flopper if you're running an RGL. It will also help with hellhounds, as it makes you immune to the fire they leave behind. For field upgrades, I always run energy mind when solo every charge fast; it will kill or take 90% of all special's HP with all three blasts, and it takes out a good amount of zombies.
The strongholds have gas until you clear them, so having a gas mask is preferable. It's doable without it, but watch your health. Gas masks are repairable at the AMMO depot, so it can be wise to just drop yours outside when it gets close to breaking. Also, if solo, don't be in Tier 3 at all without a self-rev or an active dog.
Things often go wrong strong and fast. Don't put your fate in the chance someone will rev you; that's not always the case, especially in the red.
F4 stronghold

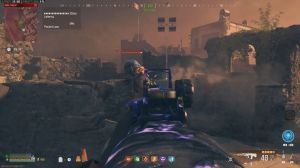
Zone, there are two stronghold locations in Ekhan. The first one I'll go over is located here at grid F4. Your safe spot is here on the nearby rooftop. Some natural-spawning zombies will come from the other side, but not many if there's no one else nearby.
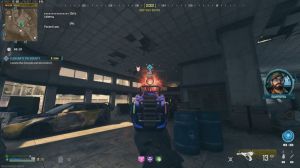
Most will climb up on top of this car, and rather slowly, this allows you to spam ads and land almost all critical hits with the Deadshot lock. on feature: once the area is clear, start taking out cysts; the first cyst will spawn a few zombies. Head back to the safe spot and dispatch them, or just pop out the ether blade once or twice; it will go through walls and ceilings and get zombies you can't see yet.
Once it's clear, head back in and hit a few more every six cysts. A small horde will spawn, warned by this sound. Whenever you hear that, run back out to the safe spot and clear the zombies. Even the most skilled players can have trouble fighting super sprinters in close quarters with many corners to be trapped in.
Of course, if you have an RGL, you can just find a corner every time the sound plays and set nades in the room until you hear peace and quiet. Once you take out all the cysts, the gas will clear, and a max ammo spawns here on the first floor, and all the high-tier loot boxes will unlock. Check your reward WS and Skidadle; don't forget to check for Pap crystals that fall out of random cysts.
G4 stronghold

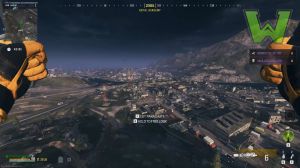
This stronghold doesn't have a safe area like the other one, but what it does have is space to move. On this side of the stronghold is a nice open patch of grass, but its many natural spawns won't exactly help survival.
The open area allows for easy training. Make sure to have out your most mobile weapon first and train the zombies, taking them out when it's safe. If you need help learning to train zombies, check out this guide on screen now. If you have Wonder W, an RGL, or the Ether Blade, it shouldn't take long to make it quiet again.
Start in on the cyst; same deal here, but your safe area is just a patch of grass out front. When you hear the warning sound, head back to the open area, train, and delete. Once the coast is clear, rinse and repeat. There's three sets of six appropriate right, and on the 18th cyst, you're done. The Max Ammo is on the roof, but that about sums up another one.
I hope it helps