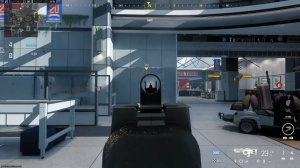
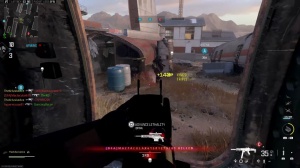
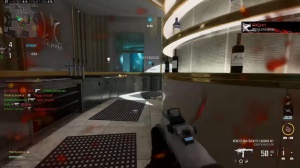
News - The Riveter Can Be Great When Built Right Warzone 2. Stats & Best Attachment Setups

This is the series where I go into great detail with all the stats of every one of the weapons in Modern Warfare 3, and in today's episode, we're going to be covering the last of the launch shotguns, the Riveter.
Damage ranges

And let's dive right into our damage ranges here. The River is the only Modern Warfare 3 shotgun that can't get a one-shot kill; however, its two-shot kill potential is just 4 M, which is quite a short range.
Our three-shot kill potential, assuming you're hitting all your pellets, is 12 M, and anything beyond that will take you at least four shots to kill, and sometimes even more than that. However, it does have the longest reach out of all the shotguns at 31 1/2 m. Just a quick note that you guys might notice from the previous gun guides.
Rate of fire & ttk
I actually had the incorrect value for the river's maximum reach potential that was just due to a small error in my spreadsheet, as for a rate of fire this is actually very fast for a shotgun at 400 rounds per minute and that's what really justifies the fact that this can't get a one- shot kill and it's generally going to be like a two to three shot kill within its effective ranges, and what this means is with a twoot kill we're killing in 150 milliseconds which is a very fast time to kill in this game and even with a three shot kill which is going to be fairly common with this gun we're still killing in 300 milliseconds which is still a very competitive time to kill with most of the other guns in this game beyond that though this is where its Effectiveness really starts to drop off so ideally you want to make sure you're taking no more than three shots to kill with the Riveter.
Hipfire vs tac stance vs ads

If you can manage it , then let's get into our hitfire spread, and there's nothing too out of the ordinary here; our minimum hitfire spread is a little bit better than average, whereas our maximum hipfire spread while moving is bang on average for the Modern Warfare 3 shotguns, and then I just wanted to show you guys the aim-down sight spread; it's not bad at all; it's definitely better than the Haymaker at 2.2 de per second.
Handling & reload add time
Next up, let's have a look at our handling statistics. Our aimed outside time is actually quite good for a shotgun at 290 milliseconds, and our sprint out time is okay for a shotgun in this game, at least at 210 milliseconds for our standard sprint out time and 310 milliseconds for our tactical sprint out time.
As for our reload ad time, this is 1.55 seconds, which is not amazing but also not bad by any means. I'd say this is just kind of like an okay reload; however, it is also worth noting that we get a great default magazine capacity of 15 rounds with this.
Mobility
And then finally, for the base stats of this shotgun, let's have a look at our movement speeds.
For our base movement speed and sprint movement speed, these are just standard for shotguns, and then our aim walking movement speed is a little bit above average at 3 m/s, so it is actually fairly viable to strafe in gunfights when aiming down sight. And there we go, wrapping up all of the important base stats of the rifle.
Ammo type breakdowns

Now let's get into the important attachments, and we're going to start this off with the ammo types. The first one is the ball ammo, and this is just horrible. I'll tell you guys right up front: don't ever use the ball ammo.
Well, you do get infinite hit potential with this; it's extremely inaccurate at really long ranges, so the chances of hitting are pretty low, and then on top of that, and I'd say most importantly, we don't have a two-shot kill potential to the body with this, and our three-shot kill range is only 5.9.
M, so that's not very good at all for a three-shot kill. With this, while we are significantly reducing our maximum hip potential to just over 20 M, you might notice we're significantly improving our two-hit kill potential, at 8.7. M, assuming the enemy isn't using EOD.
Barrel breakdowns

M which is pretty crazy but also pay close attention to that three- shot kill range cuz that's still the effective range of this gun in my opinion that's 16 M now which is very impressive. And then finally, we have the JCX L suppressed barrel, so it's got an integrated suppressor in it, and it slightly improves our damage ranges.
Our three-shot kill is now 14 M, so honestly. I feel like you can't go wrong with any of these barrels; it just depends on the type of build that you're trying to create; they're all good in their own ways.
Choke breakdowns
After that, let's have a look at the chokes that will tighten up our aim-down sight spread compared to our base aim-down sight spread, and as you can see here, we have the Bryson Improve choke as well as the Bryson choke and crownbreaker muzzle, and it's quite interesting with my tests here.
The Bryson choke and crownbreaker muzzle should have a noticeably tighter spread compared to the Bryson improved choke, but we're not really seeing too much of a difference there. In either case, with any of these chokes that you're using, we will see a very noticeable improvement compared to the base-aimed down sight spread, and also, just like with the haymaker, there is that interesting characteristic if you use the caned laser.
Canted laser trick (0 ads spread)
")
When you aim down sight, all of your pellets will go into the same hole; it will be perfectly accurate every single time, and that's something we're definitely going to be taking advantage of with at least one of our builds today.
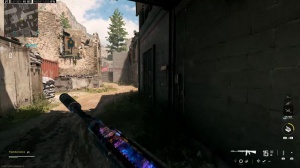
Riveter - hipfire/tac stance build
Speaking of builds, let's dive right into the first one I'm going to share with you guys. This is my good all-around, hipfire tack stance build, and with this one we're using the crownbreaker choke, the Sa Draven 20-long barrel, and the broom Bastion angled grip. The Verdant hook box laser. And then finally the DB 15 light tactical stock, and with this particular build, you can see we have very tight hiti fire spreads and also a very tight tax stance spread, and while the in-game menus state that our tax stance spread isn't as good as our aim down sight spread in practice, it actually appears to give us a tighter spread than aiming down sight, which is great because then we also get the benefits of tax stance.
Now with this build, our full aim down sight time is 304 milliseconds, which is a bit slower, but if we're just going into tax stance, it's actually faster than that value, and our sprint out time is also slightly improved at 200 milliseconds. And since we're using that long barrel, our two-shot kill range is 5.2 M and our three-shot kill range is 16 M, which are both quite solid for this particular gun, so like I said, this is just a good all-arounder. Nothing too out of the ordinary with this build, just improving the stats nicely and making it quite solid.