News - Is The Haymaker A Good Shotgun Warzone 2. Stats & Best Attachment Setups
This is the series where I go into great detail with all the stats as well as some excellent attachment combinations for every gun in Modern Warfare 3.
Damage ranges & ttk
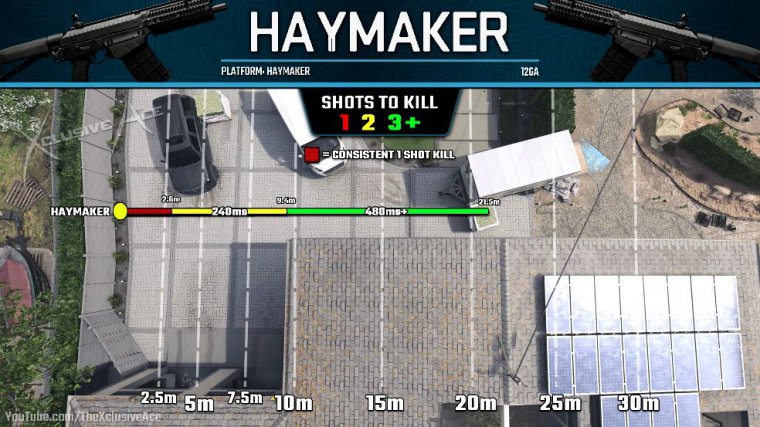
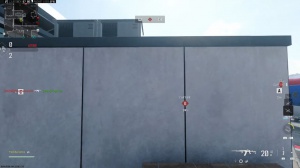
In today's episode, we're going to be moving on to the Haymaker shotgun, and let's kick this off with our damage ranges and our one-shot kill potential. As you can see here, we can only get a hit marker within 212. M, which is the worst of the Modern Warfare 3 shotguns; anything beyond that, you can't even hit the target.
Also, within that range, it's going to take you at least three shots to kill, but often more than three shots to kill, depending on how many pellets you're hitting. Then, our two-shot kill range, which is honestly the most important range to focus on with the Haymaker, is 9.4 M, and finally, we have a very consistent one-shot kill potential at 2.6 M.
Within that range, you're very likely to get a one-shot kill unless you're only hitting like one or two pellets.
Rate of fire
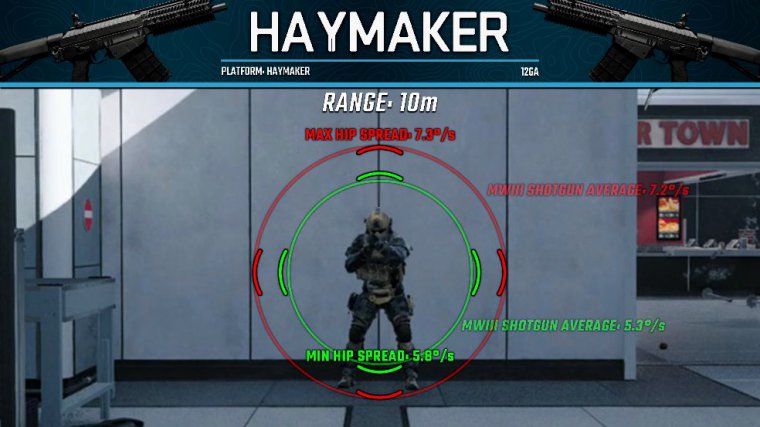
As for our rate of fire this is 250 rounds per minutes and what this means for our time to kill potential is with a two- shot kill we're killing in 240 milliseconds, three shot kills 48 80 milliseconds and a four shot kill that's all the way up to 720, milliseconds which is ridiculously, slow so you definitely want to keep yourself at least within the twoot kill range that's generally what you should be aiming for with this gun like if you happen to get a one- shot kill that's great but for me I always aim for a two- shot kill and if you manage to do that 240 milliseconds is a very fast time to kill that will be beating out most of the guns in this game , as for a hitfire spread our maximum hitfire spread while moving is pretty much right on average for shotguns it is pretty wide and then unfortunately, our minimum hitfire spread when we're standing still, it's actually quite noticeably worse than average here it's pretty bad by default, and this is one of the biggest things that holds this shotgun back from being really consistent.
Hipfire vs tac stance vs ads
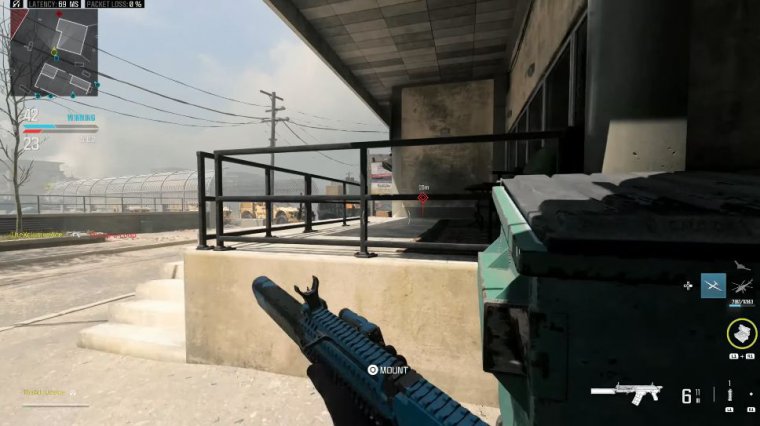
On top of that. I thought I'd throw in the aim down sight spread here, which honestly isn't great either by default; at 10 m against the target, even if you're perfectly centered while aiming down sight, you're still likely going to be missing a couple pellets. So when it comes to overall pellet spread, at least for core game modes.
I'd say that one of the biggest downsides is that it does lack a lot of consistency due to the fact that you never know how many pellets you're going to be hitting unless you really focus on that with attachments.
Handling & reload add time
Next, let's get into our handling stats. Our aim-down sight time is quite slow at 340 milliseconds.
And on top of that, our sprint out time is very slow as well, at 262 milliseconds for our standard sprint out time and 400 milliseconds for our tactical sprint out time, so that's yet another downside you really have to be aware of with this gun. You don't want to get caught sprinting, and you especially don't want to get caught in a tactical sprint.
But then let's have a look at our reload ad time, which is actually quite fast at just 1.37.
Mobility
Seconds so that's one of the big upsides with the Haymaker you can get that really quick reload in by default, and then finally for base stats before we start covering the key attachments let's have a look at our Mobility stats and as we can see here pretty much across the board we're just right on average for shotguns aside from our Sprint speed this is below average it is going to be sprinting around the map a bit slower than the other shotguns, and that is just something to be aware of, and with that let's now move into the different ammo types since they have a very large impact on the shotguns and we're going to start this off with the Slugs with the haym maker, and when using this we now have infinite hit potential with this gun.
Ammo type breakdowns
However, the only time you're going to get a one-shot kill with this slug is within 2 and 1/2 m to the head; it will never be a one-shot kill to the body on a full-health enemy in core modes, and then on top of this, we actually have a damage range drop off at about 37 M, and that's our maximum two-hit kill potential to the Torso; anything beyond that is going to take you three hits to kill; if you're hitting leg shots, that will also make it a three-shot kill; as a result, slugs are not ideal with the haym maker.
Especially when you consider The Recoil, if you're just firing this at full auto, you're going to see a huge jump between that first and second shot, and therefore you typically have to, like, really slowly tap fire this; you can't just spam it at the maximum fire rates, and then at that point, your time to kill potential is so slow because you're having to hesitate and pause.
That it's just not worth using, at least in my opinion most of the time now. Is it completely unusable? No i'm sure you could make a slug build work, and I am going to be sharing a slug build toward the end of the article; it's just definitely not my preference. As for the next ammo type these are the bolo sh shells and just like with the Slugs we have an infinite hit potential but now our two- shot kill potential to the Torso is just 10 m and anything beyond that will be a three plus shot kill, and also there is no one shot kill potential with this even to the head at Point Blank Range it won't be a one shot kill so really not a good option in my opinion but the one upside with this is it does delay enemy healing, but as I always say I'd rather just use something that's capable of killing them in the first place rather than something that sort of tickles them a little bit and will maybe yield an assist after I die but then after that we have the explosive Slug and this is actually very comparable to the standard slug with this we do get a slightly larger oneit kill potential to the head at 3.7.
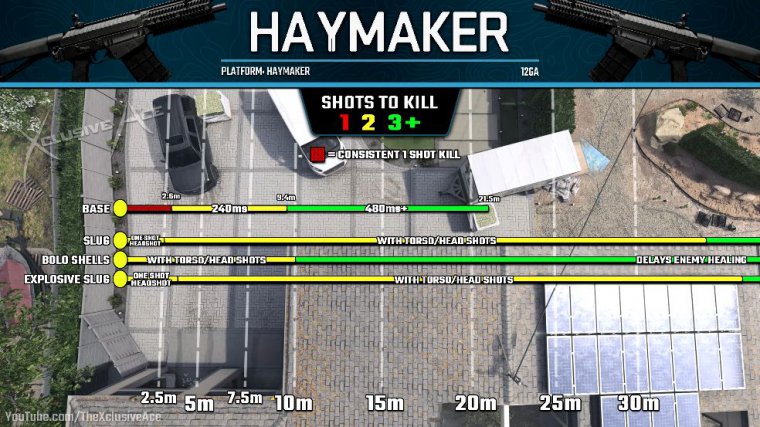
M, then we get roughly 40 two-shot kill potential for the Torso, and then anything beyond that will be a three-shot kill. However, just like with the slug, we do see a lot of recoil here, but there's also inaccuracy. I forgot to mention that with the slug, it's not necessarily going to go exactly where you're aiming; there is some randomness programmed in there, so again, it's not completely useless.
I'm sure you could make an explosive slug build work, but it's just not for me, and I'd rather use a standard buck shot, and this just leaves us with one last ammo type, and this is dragon's breath, and this is actually pretty decent on the Haymaker; it will slightly improve our oneit kill potential at 3.9.
M compared to the base, which is 2.6 M; also, our two-shot kill potential is extended out to 10 1/2 M, so a little bit better than the base; however, our maximum hit potential is reduced down to 19.8 M.


