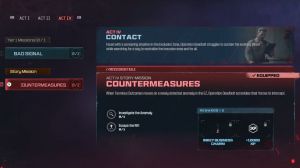
News - How To Complete Act 4 'bad Signal' Gorm'gant Worm Boss Solo Guide. Warzone 2 Zombies Act 4 Solo Guide

So welcome back, guys! Here's another Modern Warfare 3 guy, so in this one we will be doing the Act 4 mission bad signal. This is for solo players, so you will be able to easily do this solo if you follow this guide. So if you don't know what this mission is, basically you go into the new zone from season one.
The Dark Keeper, and you get to run around and activate four seals, and then as you go to leave, you will need to battle one of the Ether worms, so this is your guide to completing that. So what you want to try and get is a flawless ethereum crystal to pack-and-punch your weapon to level three. If you can't get one of these, then simply go into a game and complete contracts until you have enough money to go to the Pack-a-Punch machine in the Tier 3 Red Zone and Pack-a-Punch to Level 3 for your perks.
You're going to want to put stamina up, Speed Coler, Juggernog, and PhD Flopper on; these are a minimum requirement, but you can obviously put the others on if you want to put them on. You will also want to get a shatter blast ammo mod, and you will want to try and get either a Le Epic or a legendary.

These EA tools will just boost your weapons. Rarity is either epic or legendary, depending on which one you have. Obviously, I recommend legendary, but if you can't, then just get epic. So for the weapons, we'll use the WSP Swarms, and we'll put the WSP Reckless 0 long barrel on the hip shot L20.
Laser, the 9 mm High grain rounds a 100 round drum and we will also equip the wsp, akimbo brace stock, so once you've set all this up, you will then want to change your Tactical grenade to decoy grenade and put your lethals to, thermite or the EA blades if you have them, so, stepping right into the game what you want to do is come over to the Red Zone and come to this little xill with the star on it that says bad signal this only has one spawn location don't so don't worry about looking around the map for it'll always be by you come up interact with the portal, and then go onto your attack map and hold wide to vote to go into the mission so just obviously wait until the countdown finishes and it starts to teleport you to the mission.

Once you're in the mission, you'll have four yellow icons pop up around the map. You will need to make your way around each and every one of these yellow icons, which will basically bring you to the seals. You just activate the seal, and then basically just get zombie kills around this seal, so just come up to it with it, and just basically run around in the circled area by killing the zombies until the meter on the side is completely filled up and you have completed the.
So as soon as you've done the first one, obviously make your way over to the second, and as soon as you're at the second one, activate it again, and then just kill the zombies around the area to fill up your meter. So obviously, as you can see, when you kill the zombies, there's like soul things that actually go into the seal, so this is how you know it's actually working, so just kill until your Meer is full and then make your way over to the next seal once that one is done.

So again, just literally run around. Kill the zombies in this area by filling up a seal, and then, as soon as this seal is done, move on to the next one, which obviously is our fourth and final one, until we move on to the actual boss. So just a note: when you're doing these, just keep basically moving around.
Never stand with your back against the wall or anything like that. Just always keep moving around in circles. Keep an eye on what's coming from what directions. Try and kill him off as soon as you can, obviously to avoid going down. If you do come into here, you will want to bring a couple of self-revivals just in, Case, so once we've filled up our last seal, you will then get another.
A little yellow icon pops up around the map, so as soon as you have finished there, fold the meter up for the fourth and final seal. You will see one of those yellow icons pop up further on, down to the beach area of the map. Just come over to it when you see this portal, and as you run up to it, a worm will spawn.

So as soon as he spawns, what you want to do is just try and start shooting him. You want to shoot the purple areas around his back, as these are his weak points, and you don't want to shoot the hard, rocky area of him because this will not do as much damage. But you also want to keep in mind that he does shoot these little orb things out of his mouth, and they will basically deal damage to you as they chase you around the map.
You need to be careful with these. They do deal quite a bit of damage to you, especially if there's loads of them chasing you, and to be honest, they can't be quite annoying, so it is best to try and keep an eye on them and take them out as soon as you can. As you can see, that was his first attack, which is like a lung in sort of hitting you, like lunge down and try and bite at you.

That was his second one. If he shoots this laser at you, you want to try and move out of the direction this laser is going because you will go down like that, so just keep literally running around when he burrows under the ground. I would suggest getting to a bit of higher ground because he will come up and basically eat you, but if he does eat you when you're in his mouth, just keep spamming in until he spits you out, and then this will force you to, basically, open your parachute as he spits you out because if you do not deploy your parachute and he spits you out, you'll literally be spat to the floor.

And, basically, go well; it is an instant down, so bear that in mind. Mind, obviously, keep your ammo stocked up with this ammo crate this literally on the beach, just keeping on through his attacks. kill these orbs that are chasing you around, as I said they are quite annoying and they do deal a bit of damage to you so if you have one it's not so bad but if you got like four of them like chasing you and hitting you then you're going to be losing quite a bit of health, so again if he shoots at laser at you need to try and move out the way like the direction is coming at because that's pretty much an instant down if you haven't got any armor plates on, but again just, literally, keep it running around in circles, and you should be, pretty much fine with this when he does borrow under the ground just literally come to a bit of a higher ground to avoid him eating you and just shoot the floor and you should pop back up or throw grenades at the floor.
Whatever you basically want to do to try and get him back up, don't ignore him because he will take a while to come back up, so just keep shooting the floor or throwing grenades at the ground to get him back up from underground. As soon as you have killed him, you will be given 2,000 XP for killing him.