News - Warzone 2 Zombies: Red Worm Fight Complete Guide
Intro

I'm bringing you a complete guide to the biggest baddest boss in Modern Warfare 3 zombies, The Red Worm. The red worm was added as part of season 1 and is the only way to get three of these six schematics added to season 1. I'm not going to lie to you; this fight is no joke, but don't worry, I've got you covered.
I'm going to teach you how to start the fight, I'm going to give you tips on what to take to the fight, and lastly, I'm going to give you some strategy for during the fight. If you're looking for the best content to get the most out of Modern Warfare 3 zombies, then you are in the right place.
Early game
There are two main approaches to this fight.
This fight scales in difficulty with how many people are there, so you could go with a smaller, stronger team, or you could go with a bigger team. I've done this fight five times; three of those we had six people, and two of those we had 10 to 12 people, and this article is one of those larger teams with 10 to 12 people.

In my win-loss record, I've only killed it once as a six-man, and then on both 10- to 12-person teams, we killed it both times. So, really, it's up to you personally. I like the larger team strategy. Before I explain how to find the four items you need to be able to start the fight, let's talk about before the match even starts so the way the fight actually happens in the storm after the 45-minute timer.
But you don't know exactly how long it's going to take you to find the four USBs you need to start the fight, plus you don't want to balance that with having to grind contracts to get money to try and upgrade your weapons. Therefore, what I recommend is probably taking in two ether tools and at least one crystal if you can, if not two.
What I went to was that I went with two pack-a-punch, three guns, and legendary tools on both of those. It just saves you some time, so you have to worry about that time crunch and you have more time to, you know, basically get ready or assure you find all four pieces to be able to start the fight.
Alternately, what you could do is have someone grind contracts while the other two work on the USBs. So I mentioned we had almost 12 people there for the fight, and part of the reason, and I highly suggest you do it to make the fight even easier and balance the rewards, is that as soon as we got into that game.
I started typing in text chat trying to recruit people to come do the fight. That way, people have more time to prepare, and it's more likely to actually get people to show up for the fight because, just as a three- or a six-man fight, it's much more difficult as opposed to a nine- or 12-man fight like we had. Definitely a tip I highly recommend.
Usb photos

The first step in starting the fight is to go all the way to the northeast corner of Ersan to this building in Orav Military Base. The easiest way to spot this building is when you look at the map; it's the shape of an l. Once inside the building, go to the second floor, and you're looking for a desk with a map of Ersan with two photos on each side.
These photos show the general location you'll need to go to get a gold USB, of which you need all four to start the fight and bring out the worm. Because the photos don't tell you where on the map it is, I looked for some kind of big landmark that could match up to the map and give me an idea of where to go.
Usb 1
For example, for the first USB, I noticed this very specific section A, and I was actually able to match it up directly to the Orov military base and start exploring around in there. What you're looking for looks exactly like the mobile UAV towers from War Zone 2. It's basically a laptop on a stand with a post and a spinning satellite dish on top.
What you'll do is go up and interact with it. It'll finish its animation, spit out the USB, and store that in your inventory.
Usb 2
The second USB I thought was in this section of the Tier 3 Red Zone because I matched up the buildings on the map to the photo, but I actually missed a couple very critical details that actually put me in the wrong zone.
If you notice in the photo, there's actually quite a few buildings around the upper edge of that section, and in this courtyard, there's none of those buildings at all. When I moved over to this courtyard on the opposite side of the Red Zone, I instantly spotted that spinning satellite and went up and got USB number two.
Usb 3

For USB 3, I had to go towards the Zero suburbs and again look for a big landmark. The photo is really simple. I saw this big building on it, so whenever I actually did find it on the map, I easily spotted this big city hall-looking building.
My first plan was to get that high ground and try and look around to spot the little device I get the USB from, and while I was actually trying to find a way onto the roof. I actually found the device and got USB number three.
Usb 4
USB 4 is probably the easiest to match the photo to the map just because it was these very distinct and obvious apartment buildings on the west side of level two or zone right on the edge of the Seaport District, so I headed over there and luckily found it right in the middle of the four buildings in the courtyard.
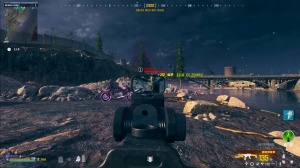
Fight location

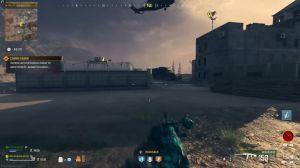
Now that you have all four USBs, you're probably asking, Where's the fight actually going to happen? What you're looking for is two ammo caches very close together, somewhat close to the storm. For us, it was on the east side of the map, and as soon as we saw it, we knew it was exactly what we were looking for.
Plus, there's several big advantages to having those ammo caches right there, which I'll cover in part two of this article for.
My inventory
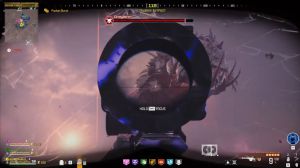
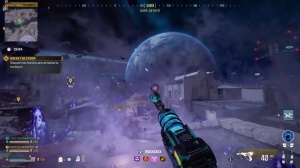
In Part 2, I'm going to talk about what I took to the fight and what I think are absolute musts to have success in fighting the red worm. The fight actually happens inside the storm, so the biggest thing you need is a durable gas mask.
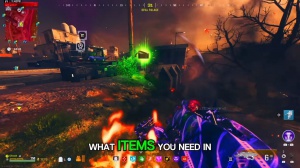
My first secret weapon for this fight is a sentry gun. Each member of my team made sure we held as many sentry guns in our inventory as we could while still saving a few slots for the other things I mention here later in the article. I've gone to this fight with as few as four sentry guns and as many as seven, and actually, the most recent time we killed it, we had a guy get a car and actually put his sentry guns down and go back to a buying station to buy more.

Sentry guns not only help put constant damage on the worm but also help contain some of the other zombies that will be in the area. The next thing me and my teammates all did was self-revive. We each had two; we had one equipped and one in our inventory, similar to self-revivals for your field upgrade.