News - Easy Solo" Aether Blades, Gold Armor Plate And Dog Bone Schematics Guide (warzone 2 Classified Schematic)

Today I will be taking you step by step on how you can run the dark EA Tier 5 solo, which is pretty much guaranteed as long as you can get one thing, which is the VR1 wonder weapon. Obviously, for this, the VR11 wonder weapon is brilliant for the ESO contract, as it will actually heal the tank and restore it to full health.
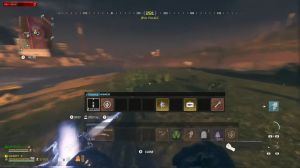
So first things first, you want to get all your gear and get ready to go in, so you want to buy a couple of self-revived a couple of Juggernaut and some Casmir grenades. The more Casmir grenades you can get, the better, as these will help quite a lot, and then the most obvious, the VR1, and the gun of your choice, obviously get these to pack free.
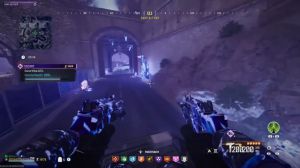
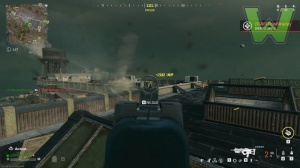
Get a legendary e for all to go in to the max to pretty much guarantee this run to be successful, so as soon as you're in the dark, here is a layout of the map itself. The black arrow is where you spawn, and the white one is where the escort contract is, so obviously the escort contract is going to be the first one we're going to get rid of, so basically, get rid of the hardest one first, so just come over and activate the contract as you would normally do in any contract.

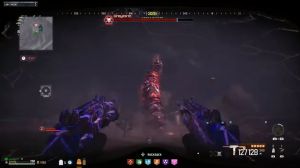
Come to you, and then just jump off you and parachute over to this area, as this is where the ACV will spawn. When you get here, you will notice a megabomb here. Just simply take him out. I assume you probably know how to take a mega bomb out; otherwise, you probably wouldn't be trying to do this, Run.
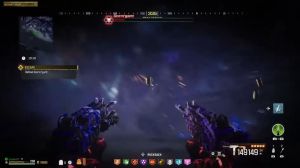
Now, as soon as you have managed to successfully take out this mega bomb, first things first, you want to just restock on your ammo, so if you haven't, like if you're low on ammo or whatever, just come over to BU, and there's an ammo crate for you to refill your ammo, and then make your way to the ACV, just activate the ACV, and basically, just jump on top of it, so if you know how this contract works Basically, zombies that are coming from the front of the tank will pretty much deal with all of them, so your main concern is to defend the back of the tank.

Manglers disciples, mimics and the obvious Mega bombs, the tank won't be able to deal with them so if you do come across any of them you will have to kill them from the front but your main concern is the back to basically kill off any zombies coming from the back of it, so just as soon as you get to your first stop just as you've seen throw a couple of Casmir, and this will basically just automatically, wipe out most of the zombies and you will have literally no concerns about defending the tank as long as these grenades are active, so, as soon as you've done the first one and you start making your way to the second Point obviously try and take out the zombies from the back take out any mimics or whatever from the front if there are any, and then by this point you should encounter one of these Mega bombs Just throw a jugal suit down and just take out this mega bomb.

Obviously, I'm telling you to take the juggernaut suits because they are very effective in taking down these mega bombs, and you can take out an awful lot of zombies in the process of doing this. So, again, once you reach the second stop point, throw some Casmir down, and obviously this just helps quite a lot because you don't really need to worry about any of the zombies that are coming, but manglers disciples mimics you'll still need to take out manually so these Casmir won't really affect them, so just literally, defend the tank as much as you can, and then just wait until you start and move to the third and final.
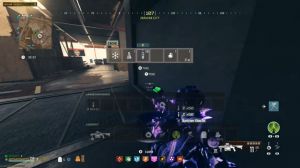
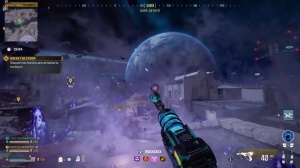
Stop, so now yeah. I will show you the beauty of this VR1, so if you shoot it by you or at the front of it, just underneath it by yourself, you will notice the health go all the way back up, so again, for those who didn't catch that, if you shoot it by you or at the front, obviously, this mimic does grab me, so I didn't successfully shoot it this time, but once he's thrown me.
I'll then go back to showing you the front part that you need to shoot, so this is where you need to shoot it at the front, and it will restore all of his health. But once you get to this point, you want to throw another Jugger all-suit down. Just wait for that to come down. As soon as that comes down, throw some Casmir.

Pick up the Jugger no suit, take out the mega bomb, and then just take any excess zombies out that are basically surrounded in the tanks. Just take out as many as you can, and then as soon as the suit runs out, fill it back up with health if it's low, throw some more Casmir, and then hopefully by this point your contract practice is successfully completed, so just go to your rewards Rift, get your schematic out of it, get any other rewards you got for me, and we'll proceed on to the next contract, so for the next one we'll be doing, which is the E for extractors, and that can be found by you on this hack map, so just run over to it, activate it, and then make your way around to the free object objectives that will appear on the map after the contract's.

Activation, so when you get it, just take out any zombies that are basically surrounding it; if you have any Casmir left, use them, as this will basically just help clear out the zombies and give you time to actually disable the E for extractor, once you've done that just follow this route and make your way to the second epher, extractor, to disable it, now again once of the second one just take out any zombies; if you have any Casmir left, use them; if not, just try and take him out manually, and then we can move on to the third and final eph.