News - Easy Tier 1 Bad Signal Story Mission Completion For Act 4. Call Of Duty Warzone 2 Zombies
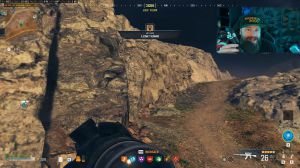
Basically, you can just go up to the castle wall here and scale it over the top, and you can fly down, and it's in this middle area. Now, this one to me is the easiest pillar of the three, but essentially the circle that you can kill the enemies in is quite big, and you can play around this middle pillar area, essentially using that to juke the enemies.
But again, you activate the pillar, you wait for the enemies to come in, and you kill them inside the circle, and that's three of four done moving up and over here. Then we can move towards the parking area, which is all the way on the lake left side of the map, and this is going to be our final pillar.

As we come down into this area again, this area seems to have a huge amount of disciples, so obviously, you know, keep that in mind, but activate the pillar, and again, just dance around the area and use energy mine aggressively. Of course, decoy grenades are also fantastic because you can give yourself a little bit of a breather if you are seeing too many zombies come at you.

If you have to step out of the ring to take a little bit of a breather to get some plates on, you absolutely do that. As soon as you clear this fourth pillar, you are going to get to the final objective, which is essentially extracting. On the beach, which is all the way to the south of the map now as you make your way over there you're still going to be assaulted by a huge amount of enemies and everything like that so it's fine try to go fast as possible use this time to refresh your plates inside your inventory that you might have spent during the previous accters, since once you start the worm there's going to be a little bit less zombies, and you're going to be concentrating more on actually dealing with the worm then you know you know trying to pick up plates or something like that to survive so you know try to spend a little bit of time if you just need to get yourself a few more plates and get ready for the fight as you get to this Beach area verify whether you have the map that has the dead ball tart on it always spawns over here, if you do have it that means that you now have a place to put your dead po sorry your dead ball turret circuit fors into it's a hell of a hard word phrase to say.
But that means that you can then throw that in there as soon as the encounter starts. In the case of you not having the turet there, you can throw these circuit boards away because they're useless to you, and then you have some more space in your backpack—something like, for instance, armor plates.

As you get down onto the beach, instead of being able to extract the worm, it will pop out, and that will start the final encounter of this mission. Now there are still going to be some zombies that spawn, but generally they're going to be kind of like coming from the beach at the bottom, and you'll usually get one or two or maybe three of them that push you up in this upper area, where I suggest you fight from this sort of laboratory.

Bathroom area up here I have seen some guides where people go up onto the you know the castle ramp parts and things like that and fight the worm from there the issue with this is that this worm does heal when it goes underground in baros, essentially when it loses focus of you or when it can't find you or attack you for an extended period of time it will heal and because it has such a massive HP pull any amount that it heals is super painful because it means that you have to spend longer basically killing this worm, now you do have quite a bit of time to be able to do this as you can see in the article that's going in the background, you should have arrived with quite a bit of time to spare if you followed the footage and the way that I did it but the point is that this time you can throw down your Sentry turrets you'll see that I had some on the ridge over here you can pop your circuit boards in the dead Bol tart and then you can take up position near this bathroom, and essentially just pop out to the left and shoot at the worm every time he's out.
If you've fought these worm bosses before, and you definitely have, by the time you've reached here, you will recognize a lot of the attacks that this worm has he has the laser beam coming out of his mouth, and he has a slam attack we essentially forc down and he summons these small little sort of wisps that essentially fly around and attack you as well the difference between this worm and the other worms that you fought up until Nows those wisps do a fuckload of damage so you should absolutely, prioritize, them and shoot them as soon as they come out the good news is the place from which you are fighting from which is this bathroom.

It gives you an opportunity to kill them as they come flying by and sometimes get stuck on the walls that you were looking at when you face in the opposite direction of the worm, so sometimes they will, however, quickly curve around and essentially attack you between the pillars. What you can do at this point in time is just dip into the bathrooms and fight them from here, and you know, obviously, God will help you if one of them flies into the bathroom behind you.
That has happened to me, and if that happens, then, you know, I wish you all the best luck and I hope you kill it nonetheless. Whittle away at this worm from your area where you're fighting here. Be aware, though, that the last possible attack that the wor can also do is that while he's borrowed in the ground, he can come out of the ground and essentially try to swallow you.

There are two things that you can deal with, Rather that you can do to deal with this. First of all, as long as you have plates on, he will just bump you away, but it could be possible that because this fight has been going on for so long that you don't actually have any plates anymore, and in this case, if he bumps you into the sky and tries to swallow you, you should just be spamming the parachute button, and what can happen is that your parachute can deploy and you can essentially fly away.
Nonetheless, you have a huge amount of self-revive, so even if you do go down once or twice, and I believe I went down, I think twice. Once or twice, the point is that you can come back up, and every once in a while, you'll still be able to see one or two zombies sneaking up on you. You can kill them and take their place, and that's it.
Keep whittling away at the boss's HP, shoot the critical areas on the boss's body, avoid the lasers by dodging into the bathroom, shoot the whisp when they come out, go get yourself more molotovs, and keep throwing them on the beach when he submerges.