News - Jvert's Warzone 3 Ps5 Graphics Settings. How I Make My Youtube Videos
Intro.

It's Jayver, and today I got y'all a very highly requested War Zone 3 Graphics Settings article. I'm going to stop yapping.
How to download clips from ps5.
Let's get to it. The main question I get is: how do I get my PlayStation 5 clips to my PC or whatever your editing software is? How do I get it to be 4K? I'm going to be showing y'all; all you need is this right here.
This is a USB—any type of USB. I got mine from Walmart for like $6, so you just go to Walmart or, like. Dollar Journal, anything like that; it's like $4 to $7 at the most, so all you need to do is get a USB like this and just plug it in to the USB port on your PlayStation 5. I don't know about PlayStation 4, and I don't know about Xbox, but I know this works on PlayStation 5.
All you do is plug it in, and then you go to your clips on your PlayStation. Go to the media gallery. Any clip you want to upload or download to the USB, you just press these three dots right here and press copy to USB drive, what you want to do it allows you to download your clip in 4k quality like mine so it's not going to be like the 1080 and it's not going to be like blurry so if you do it like this through the USB it stays in 4k, so after you copied it to the USB, what you want to do is get the USB that you copied it plug it into your laptop or PC, whatever you want.
My editing software.

So now I'm going to show you all the editing software I use and the filters I put on my articles to make them look good, and I'm going to show y'all a few songs that I always use because a lot of people ask me what songs I use. So first, all you want to do is just go to Google. I meant to close out that, but all you want to do is go to Google and type in Light, Works, and it's going to bring you to this Click on this, and click on start editing for free.
I use this one right here. The reason I use this is because I can upload in 4K, but you can upload in, like, 720 in the free version. But this is what I use right here, so press subscribe now, and this is going to let you download. I already got it downloaded, so I'm going to just show y'all, right?
and it's going to bring you to a screen like this.
My filters.

Once you get to this screen, you want to make sure, like I said earlier, to have your USB drive plugged into your PC or your laptop, and you just want to go to files, and your USB drive should be this, and then press the PS5, create article. Clips, and you can just see the dates whenever you upload them, so I uploaded mine earlier today.
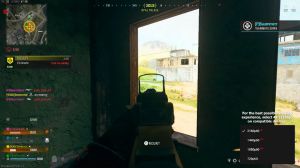
This is the time right here, so just drag it right here, all right. So this is a clip I got from my USB drive, the one that I uploaded for my PlayStation earlier in the article. So this is what it looks like with no filters, and I'm going to show y'all how to put the filters and how I put the filters that I use in my articles on.
So all you want to do is press VFX, and I'll show you each one, so just watch slowly. Press VFX right here. Press color correction. Just drag it on like that, and then it's going to show you this menu right here. I know this looks kind of complicated, but I'm just going to try to go as slowly as possible, so what I do is put my saturation on 100, and then I grab.

I did another color correction. I put another one on there, and then I put my saturation on, like 15 I. Think so boom, it looks like this. Now, in the next version, this is like my favorite filter. I added go to stylize right here, and it's called glow, so get the glow. Drag it i know it looks like this, but you change the source luminance, change this to blue, and put the tolerance right here.
Change this all the way down to zero and the strength. You can really play with this however you want it, but it just acts like that glow effect. A lot of people ask me how I put the glow effect on, but I put mine on like it's a weird number I put mine on. 17 and then after that you got the glow, the two color corrections on 1005, saturation, you want to go to Color again on the left side, and go down the temperature right here and drag it over there, and then I put my temperature onus, 30.
This is just like if it's higher, like, you can see how the map looks kind of orange. I don't really like that, so if you put the temperature at 30 anywhere in that range, it looks like it doesn't look as orange; it looks better to look at. So yeah, these are the filters that I use. This is it with the filters, right?
Filters, and then this is what it looks like when I put them on. A lot of people ask me, How does it look like this? So, a lot of people ask me where I get my music from and how I put the music in the article, and you know all that stuff, so all you want to do is go to files, and I got all my songs on my USB, so you just go to your USB, and whatever song you want to use.
I'll use it. You just want to drag it and put it on here, and it's going to ask you, whatever you do, just press import, and then just drag it under like this and turn it down. To turn it down, you just right-click on it right here and just turn the audio down like that, so it's not like blasting over the article, and actually I'll show you up.
Next, I'm moving.
Outro.08:02

Come, Here Snoop Dog, all right That's really it, for real. If y'all have any questions, which I know y'all probably will, I'm not that good at explaining stuff. This was kind of like a different article. I've never really done anything like this, but I hope you all enjoyed it. I love y'all road to 20K, I'm out,