News - 1 Solo Queue Tips On Every Map For Warzone 2 Ranked Play (terminal)

I hope you're all doing great, and this is a new series that I'm starting here on my channel, where I will be sharing the best solo Q tips on every map and mode. We are going over certain strategies, common spots to look out for offs, spawn routes, and many more. Today's episode features Terminal and SE.
To remove the hardpoint, we are only going to be focusing on search and destroy without further delay. Let's go now let's start with some basic security and destroy tips, and I'm going to go over them really quickly. First of all, on any map, make sure that you stay patient and wait for the enemy to make a mistake, especially when you are defending.
There's no need to push to their spawn as if you were playing pops. Yes, sometimes if you feel that your skill level is much higher, you can play aggressively, and it will work most of the time, but if you play against a four-stack game where everybody knows the map layout and common lines of sight, then you will constantly die.

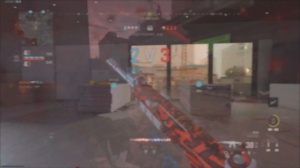
Team number two is to make sure that you stick together with your teammates, even when you are solo queuing, so that you can get traded. For example a coordinated, push on a bump site can increase your chances of winning an offensive round and in the case of solo queuing where there's no communication with your team life ping and the mini map is going to be your best friend for tip number three make sure you use your nades and tacticals wisely, what I mean by this I have seen a lot of people just spamming random NES and stands of Spawn hoping that they will hit something, now if you know a specific n spot or you're standing a common route then that's absolutely fine but in most scenarios when I play Sol Q I personally prefer to save my stun for later on because then I can use it to stun check G information or get out of a sticky situation, and finally tip number four is going to be knowing the map layout which is what the majority of this article is all about understanding the map layout can be crucial because it allows you to anticipate enemy movements and plan your strategies accordingly so let's start with terminal snd defense as specifically this area over map where the B bomb site is located, here there's a bunch of things you can try.

First, obviously, you know that enemies are going to be pushing this bomb side from Burger, and the best spots to hold this specific line of side are going to be standing on top of this escalator where you have an insane head glitch, or if you want, you can also stand behind this barrier and do what most people call shouldering, which is going left and right just to gain information, while, of course, keeping your crosha at the center.

Something to know, especially when you're challenging someone on the far left side, is the fact that standing behind these two rocks means that you cannot be walled back. I had to die so many times if this out and this is something that a lot of people don't know about and the way to test this is by using a Deployable, cover, as you can see if I place my Deployable cover on both edges or in the middle, then I am getting hit markers but if I place it behind a rock on either side then you can clearly see that this is blocking all my bullets, so really useful in most scenarios as it allows you to go Crouch or prone whenever you are weak without actually dying there's also a really insane name spot from the defense where you need to use the Ordnance glasss and aim towards the bottom left corner of this window without jumping and this goes all the way top of terminal and lasts on the far left burgertown, corner.
I have done it so many times in rank play matches where I either go to first blood or one or two enemies are really weak, and this gives me the advantage of controlling the B side because they are either going to back out and relocate because they're weak or if they decide to push, they're dead, so again, really useful, and in most cases, the tropy system does not stop this unless they place it directly in that location.

Because the Nate lands from top to bottom, if at any point the enemy team uses a smoke grenade, then this means they are either baiting or pushing you, so keep an eye for that as well. If you want to play the mid alley or mid corridor, this is the ideal spot, and this is actually a god spot when it comes to Search and Destroy because you have a clear line of sight towards both bomb sids, so you have information about whether an enemy is going to plan or diffuse.
You also have a clear line of sight towards the cockpit, and if you guys remember from my Wall Bank article that I did about a week ago, this is one of the angles from which you can wall back the cockpit, so again, this is really useful in some scenarios. And also, whenever you are watching OP2, or the Dreams area, I highly recommend you guys go prone here at this corner.
The reason is because, usually when an enemy wants to check the mid-corridor, they will center towards the vending machine head glitch, which is a very common spot, so by being prone, they won't have enough time to snap on you. Also, top is a really good position to hold where you can watch B bump side the old P2, the library, and most importantly, the plane and the bomb.

Side by side, standing behind this insane head glitch now, if you manage to spot an enemy, go for the planet while you're on top. A common mistake that a common mistake that a lot of people are making is trying to wall him from this specific location, but in reality, what happens is that they're wasting their ammo and giving away their position because the bomb blocks all the bullets.
Instead, the best way to counter this scenario is to first make sure that there's no one in the cockpit or the front seats, and then jump on top of the police car and wallbank him from here. So you cannot wall bank the bomb side from Top AC, and this happens almost every game, so this is the ideal plant location.

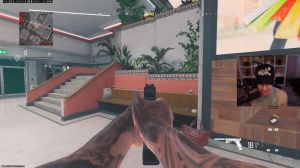
You can clearly see that the bomb protects me from anyone shooting from Top AC. Now let's move to a bomb's side defense, and the most important thing to know in this part of the map is that the connector and the plane can be seen from multiple angles, so you need to be aware of that. If you are going to peek from the connector to gain information or live ping somebody, make sure you do it quickly because what happens is that the enemy team can wall bank this window and the connector, meaning that they can get an easy kill on you.
If you want to play inside the plane, then you can use an SMG and just go prone over here and watch the connector. This is a really, really good spot. I wouldn't recommend camping inside the cockpit and just waiting for the enemy team to push, because they pretty much check if somebody is inside by shooting this fire extinguisher.