News - Warzone 2 Zombies - This Gun Melts Bosses. Easy Solo Schematics Farming
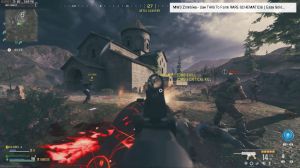
There we go, keep hitting those shots on the mega just back up a little bit, there we go, get some more distance and a laser attack coming in, beautiful, let's get that reload come on nice, good thing the reload speed is very good on this gun so we can still take advantage of that laser attack, let's back up a little bit our health is very low right now, let quickly reload, get to the other side of actually no.
I don't want to bring him too far or he's going to end up despawning his spawn point was back there, so let's keep bringing him back towards his spawn point there. Go; hopefully his face starts glowing a bit more. Come on, throw that blade, and back over here, there we are. Go, nice, and a laser attack is coming in, and that's going to be it should be able to get the kill here.

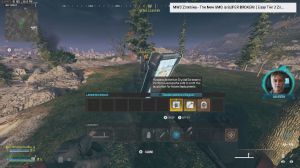
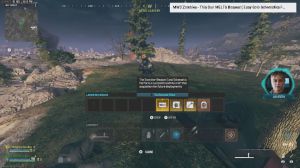
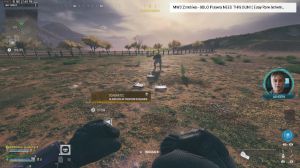
Let's almost get the reload, and that's nice, quick, and easy speed. Kaa got brain rout might as well throw that on cluster mind; we're not going to use it but might as well pick it up just a rare ether tool and a symbol monkey off that contract, so no good loot. Hopefully the Tier 5 zone has some better loot for us, so yeah, let's make our way over there.
So far, we've seen that this thing performs really well against Mega. Abominations. I'm going to say we did struggle a little bit against the disciple Bounty contract, but you know, of course, disciples are the most annoying target you can get; they're going to be pretty annoying regardless of what weapon you have unless you're using like a Tona or something, but yeah, so yeah, good against groups of zombies, good against HTS, and good against roaming Elites.

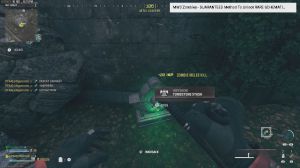
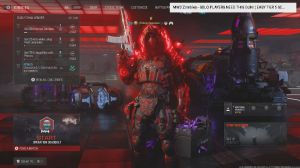
We made it to the Tier 5 zone and saw how quickly we took out the zombies here, so yeah, you notice they have some more health but definitely are not having any issues taking them out. That blade is really quick; get a bit closer to this Mega. Abomination, okay so I'll focus on some of the zombies for now okay he's actually hitting us with that laser attack so let's take advantage of those Critical Hits, there we go, beautiful took off a nice little chunk of his health bar got that mimic as well we turned the mimic so he's going to be fighting for us which is perfect so we can get back on this side there we go Mega is still back there let's hit those shots on him hopefully he hits us with that laser attack soon, again that would be perfect let's come back, here there we go think I got a nice old thumbnail there too nice I swear this car is a play to make for fighting this Mega you just sit here he barely hits you and usually ends up going for laser attacks more frequently which is very nice let's take out these few zombies right here there we go get that reload, beautiful let's not get trapped by those zombies a look at all that critical damage we just did.

Beautiful, let's hit those, criticals, nice that face just got destroyed he's only got one face left now let's come back here there we go on just one more laser attack Mega one more and we might have to reload again maybe. I don't know we might be able to finish him off here no almost though almost, there we go let's get back to our little spot here o dang okay not sure how he hit us there, think he whacked us with that tail, there we go, come back.
Here, beautiful, and that's what got the kill. No issues taking this guy out. I got that little wretling right there, PhD Flopper. We already have that, so we're just going to leave that there, so yeah, no issues taking that guy out that Mega that took us about what minute and a half, so like that or 2 minutes and a half as of right now, so yeah, no issues taking that guy out, so to get to The Ether Extractor Contract.

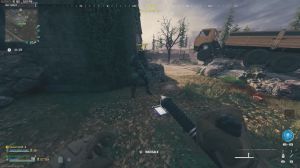
I like to climb onto this wall, jump right into the window, break the glass here, climb up the ladder that's basically going to save you from having to fight off all the zombies downstairs, and once you pick it up, jump down to this side of the building. That's going to allow you to avoid the Mega Abomination, the Mangler, and all the other zombies back there.

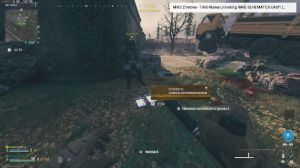
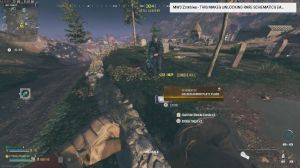
Now the first extractor is right up here. There's going to be a bunch of zombies here, as well as one or two Elites. So I like to just throw a Casmir; right here, it's going to pull in all the zombies; it's also going to kill off the disciple or any Elite that you might have here. And you can just disable that once you got that run this way here if you got zombies you can run along the wall that's going to help you a bit once you cross that wooden bridge and you get to this point here you can throw Casmir at that wall, that's going to bounce off and land right by the extractor and kill all the zombies up there we also have a Mangler up here but we won't have to worry about that guy the Casmir is probably going to kill him too there we go good that's two extractors disabled once you got that one come over here, equip your extra Casmir.
Jump onto this wall, and from here you can throw another Casmir right at the extractor; that's going to bounce off and land right there and pull in all the zombies. There's a mangler right here, and the Casmir is going to kill that as well. And we can just disable the final extractor, and that's that contract complete.
See what we get here for an extra self-revive: the raw crystal dog bone I'll take and the dog bone schematic. Nice, we're going to leave the schematic in there since I already have them and don't need them. Once you complete that, just jump to the other side here, and you can jump down to this green bus.
This is where you find the Outlast contract, so we're going to accept that and run over to this corner here, and you'll find a zip. Just take that zip. Go through these doors right here, take a left into this building, and activate the PN D. So for the Outlast contract, all you do is stay in this room and keep running in circles.

Of course, if you have the energy mine field upgrade, you can use that, which's going to get you a bunch of kills since you'll have a ton of zombies spawning. The Casmir also helps out with this contract, but yeah, just stay in this room, stay alive, and keep running in circles; there's really not much to it.
This is probably the easiest contract in the Tier 5 Zone. The Ether extractor contract that we just signed is pretty easy too. The only one that's super difficult is the escort contract, and I'd only advise doing that either in a team or if you're a solo player. Just make sure you have a vr11, or wonder weapon, because that wonder weapon actually lets you heal the ACV.
So it's almost impossible to fail that contract once you have the vr11, but yeah, if you don't, then it's almost impossible, and this is why I love that energy mine field upgrade, man. Just look at that. Look at all those kills. And there we go, contract complete. That's going to kill most of the zombies.

You might still have a couple left alive, maybe one or two Elites, as well as, as you can see, we actually have a disciple that we'll have to kill. Throw that blade real quick, our final Casmir. Just so we don't have to worry about the zombies, we can just focus on that disciple. There we go, killing the disciple.