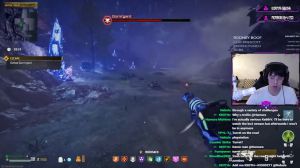
News - Warzone 2 "zombies" How To Beat Greylorm Solo Red Worm Boss Fight Best Strategy Guide

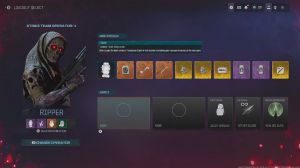
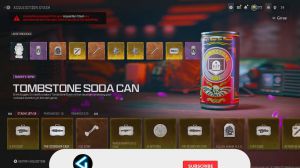
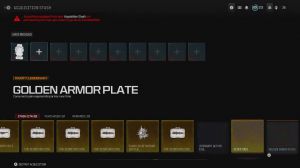
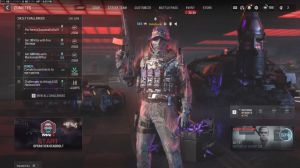
Let's go let's go all right, so this is going to be a guide on how to defeat Gr Norm, known as a secret Red War Boss, on a solo run. Before you hop into the game, you want to bring these specific items. First, the golden armor play is going to be your number one most important item since this boss fight is going to take place inside The Ether Storm.
Being able to repair armor without having to worry about armor plates is crucial. If you do not have this yet, I would highly recommend you try to get a sematic first by farming in the hardcore ether Rift. Next, we have the Flawless Ean Crystal, which upgrades your main low to Tier 3. This is going to help you a lot since it does cost $30, 000 to Pack-A-Punch fully, and you would rather use those funds for other important items in the game.
Then we have the legendary ether tool, which is equally as important as the Flawless. Crystal, maybe even more important, just because you can't really get this item with money in the game and rather have to be very lucky to get it from drop, then we have the Shadow Blast Ammo mod. The reason I chose this specific one is because the boss does have armor when you shoot at it, so this would be helpful, and it would help take care of crowd controls as well as the other two classified.

Items Here i have them at the end because I wanted to let you know that these aren't mandatory. Bringing the ether blade would be a plus, as it does instantly kill a couple zombies every time, and you are able to use it for the rest of the game. The dog bone, I would honestly say, is probably the most useless one out of the three classified sematics, mainly because it kind of just dies instantly during the boss fight.
I think maybe you can heal it if you have a healing aura, but it's still not going to be that useful, especially because you're going to have a lot of self-revival equipped. Now this next item is also going to be one of your most important items to bring, which is actually the experimental. Gap For some reason, throwing these at the boss does a lot of damage, even after they nerfed it down.

You can also get these back each time you refill your ammo from the ammo crates for lethos. I went for Malov. I think this one is just a personal preference. I just like it better because it has a wide radius for crowd control and can still inflict pretty high damage for field upgrades. I use energy now.
You're probably wondering why the energy mine is mainly going to be used to help you take care of the most useless one. Honestly, all the field upgrades in this game are pretty underwhelming, besides healing Aurora, but that's only if you're on a squad team. The energy mine is mainly going to be used to help you take care of the elites during the boss fights.
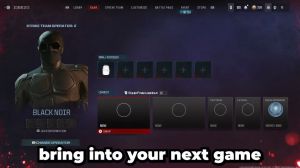
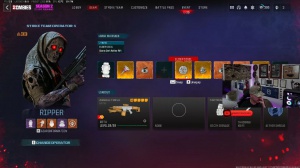
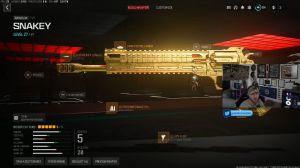
The CPOS mimics and managers are really going to get in your way. With a combination of shadow blasts, you're going to be able to regain your energy and mind. Now moving over to weapon, I went with the assault rifle hoger 556. This AR takes the lead in damage power compared to the other ARS for attachments that I use in my game for Barrel.

I chose a cross X short barrel mainly just for an increase in movement speed, but I actually think the banner 80 light barrel might be slightly better due to the cons. The reason I say this is because reducing bullet velocity means a slower fire rate. I'd rather have a slightly higher recoil and a faster fire rate.
I'd have to try on my next fight though, and then for under Barrow, I have the chewed angle grip again. This pattern is just mainly for an increase in movement speed; anything that can help with movement speed on this pattern is freaking a plus. For magazines, I have the 40-round mag, where you have more ammo in your stock, which is pretty straightforward.
For stocks, I went with the IGNIS F43. Stock again here for an increase in movement speed. The no stock does show a much faster movement speed, but the cons are kind of unappealing, so it might not be the best choice. And lastly, I gave my hoger a sight, mainly because I'm not a fan of the iron sight.

I went with the SZ mini, but you know, this is just a kind of personal preference. If you're okay without using a sight, you could slap on the laser site for better hit-fire or have a weir grip for better recoil control. And finally, before you launch into the game, you want to make sure you have the mandatory gear setup, such as the large R sack, three durable armor vests, a gas mask, which is going to be absolutely mandatory because, remember, you are fighting the boss within the ether storm, and lastly, self-revive.
For kill streaks, it really doesn't matter which one you use. I've already done tests against the balls using sentry guns and jugut suits; they basically do no damage. I've chosen the motor strike method just to help me clear the zombies. Now that you are ready, let's go over how to defeat Grey.

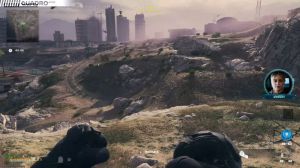
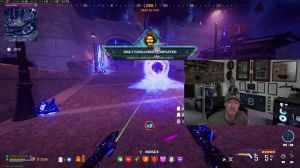
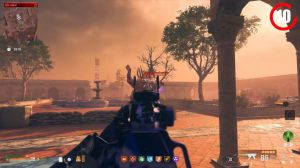
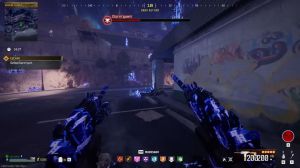
Once you're spawned into the game, the very first thing you want to check is the location of the Ether Storm, because depending on where it is on the map, it's going to determine where you'll be fighting Gry. Now this is going to require a bit of RNG, but sometimes you will notice the storm spawns much further away from the battlefield, you want to try to get one where it spawns closer, if the storm is too far away I would just xill and reset because not only do you have to beat the boss but you're also fighting against time as well you want to have at least a good solid 10 minutes right at the start of the battle if you want to have a good chance on defeating the solo if you get lucky you may get a very close by spawn or even literally spawning right at the battlefield where you'll be able to get the full 50 minutes for the fight fortunately, that game I died before even prepping up so I couldn't even test it whether I could have actually fought it without waiting for the time countdown if you do manage to get the football Battlefield.
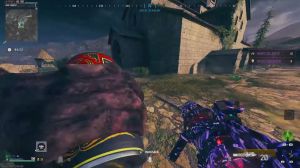
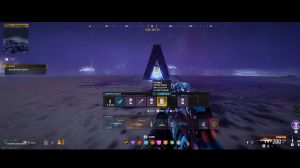
Perfect because that's also the best area for the fight. The next thing you want to focus on is trying to earn as many points as you can since you'll be needing tons of self-refreshes. One easy way to do this is to head over to the red zone right away and complete a contract for some reason, whichever tier contract you complete as your first one.

If you go back to the lower tier to complete contracts, you'll be earning the same amount of points, so for instance, if you completed your first contract in tier two, which was $3, 000, then if you're to head back to tier 1 and complete a contract there, you'll still get the $3, 000. I would only suggest going to the red zone for the first objective if you see a cargo contract; otherwise, I would suggest completing one in Tier 2 first.