News - Solo 'bad Signal' Mission Guide For Warzone 2 Zombies. Gorm. Gant Boss Fight Solo Act 4 Warzone 2 Zombies

I soloed the bed signal mission for Act 4 and mdub 3 Zombies, which includes the gor Gant worm boss fight, and in this article. I'm going to share with you some tips, tricks, and strategies that I used that I'm hoping will help you to be able to do it for yourself. From completing this, you're going to unlock the so many teeth weapon charm, which you can use on any weapon that you want to, and after completing this, you're also going to get the golden locked diary, which you can use to complete an arter egg to permanently open up the dark ether, and once you go into there, you can get yourself some high-tier rewards.
So let's jump straight into it. Obviously, first you need to make sure that you have the mission equipped. You do not need to have done any of the previous act missions in zombies. In order to be able to start this, you can head straight to Act 4 in the menus. Select the mission, and you're good to go.
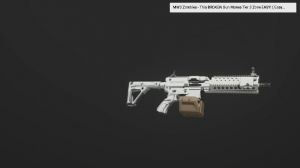
Before jumping into a game, you want to make sure that you're using a solid weapon as your primary weapon. A couple that have been working well for me are this build for the SVA 545 assault rifle, which I've been using a lot within the dark ether, and also this build for the MCW, which is what I use specifically for doing this mission solo.

As a secondary weapon, you want to either run an RPG or the RGL grenade launcher, and I'll explain how either of these is going to be useful a bit later in the article. For equipment, you want to use decoy grenades for distracting zombies. A throwing knife, which you can use to one-hit both zombies and dogs within the dark ether mission, and also the ether shroud field upgrade, which you can use to hide from zombies for a short time if you get yourself into a sticky situation.
On the map, the Mission XFI Point is going to be marked with this icon, and it's going to be labeled bad signal. It's just south of the Tier 3 Zone. Before heading here and starting the mission, you obviously want to get yourself geared up and ready to go. Ideally, you want to have a legendary ether tool for your primary weapon as well, but if you only manage to get a rare or epic tool, then this should do the trick.

Now, if you have the schematics available for you to use, then that's great. You can get a head start on getting geared up, but regardless, once you first jump into a match on Ukhan, you're going to need to farm contracts for Essence and other gear from the rift rewards. I find the best missions to knock out quickly are either the escort contracts, where you just need to quickly deliver the cargo to the delivery point; the spot control contracts, where you just need to place down those dark ether-looking trophy systems and then destroy the spores; or the bounty contracts, where you take out the hvts.
Obviously, it's kind of dependent on how setup you are to begin with, but ideally, you want to be doing these contracts in the Tier 2 zone or, if you're game enough, farm contracts in the Tier 3 zone, because this will give you more Essence as a reward and you'll also get better rewards in the reward riffs.
Once you've got enough cash, get your weapons pack-a-punch to Tier 3. Grab all of your perks that you need from either the wonderers or other perk machines around the map, and also stock up on about three or four self-revivals from The Bu station, plus three or four sentry guns. If you have enough essence, you could get one less sentry gun and instead get a jug suit from Tier 3.

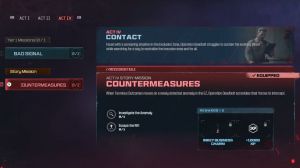
When you feel like you're set up and ready to go, head to that Mission Xville Point and interact with it to start it up. As soon as the mission begins, your first objective is to break the seals at four different locations, and you want to try and get these done as fast as you possibly can to give yourself as much time as possible to fight the gor Gant boss.

The one that you want to do first is from the left of where you spawn. You can head down the side of the gas station here to get there quickly, and if you do have that Juggernaut streak, then you can pull that out so you're holding the deployment grenade, and you'll be able to run a lot faster. Once you're here not just for this seal but for all of them pretty much you can use a decoy grenade to distract the zombies while activating it to avoid getting swarmed while you're standing there in one place, after you activate it you'll notice that a ring will spawn around the outside of the podium within this room and what you need to do is kill zombies inside of it which will fill it up with their souls and then break the seal, so try to avoid killing zombies that are outside of the circle cuz you're basically just wasting your time, while you're doing this zombies are going to be right up in your face so you pretty much just want to be hip firing your weapon nonstop, and if you did already know this you can actually plate up at the same time as your hip firing so you just want to be holding down your plate button while hip firing and strafing side to side killing zombies and picking up more plates.
Once you've broken the seal for this first location, you then want to head straight out of the building and make your way to the next one. The closest one is just down the road here in the first entrance part of the fortress; there's like a block of toilets and some car parks here. Again, if you need to use the decoy in order to distract the zombies, then do so and just use the same strategy of hip firing and placing at the same time to kill all the zombies within the radius of the circle that it spawns.

Remember, while you're doing this, if you do find that you're getting overwhelmed by zombies, you can pop your ether shroud, which will give you a moment to be able to reposition. Once you've broken the seal at this location, you can head right up the stairs that are directly behind it into the main entrance of the fortress itself, and directly in front of you, you'll see the next seal location.
Using the same tips, activate the podium. Kill the zombies within the circle radius, then break the seal, and you'll then be on to the last location. So from here, you can head out the back entrance, where there's like some prison cells and stuff, and then you want to turn right and follow along the wall until you get to the zip line, which you can take up to the top of the fortress, and then jump off to then parachute down to the final location.