News - Easiest Way To Solo The Worm Boss Warzone 2 Zombies (easy Guide)

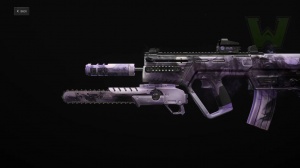
Welcome back to another MWC article. It's your boy, Ji. Today we're going to be showing you guys how to defeat Gorgan, aka the red warm, in Modern Warfare 3 zombie. First things first, this is the build that we're going to be using. I call this the new zombie meta. This one is the MCW rifle. Now we're going to go ahead and go through the build at the end of the article.
First things first, one of the things that you want to do is make sure you are packed. All the way, make sure you stack as far as perks and attachments. Make sure you guys have the Ammo Mod. Definitely have enough perks to actually survive. Now some of the perks are requirements. We will be going through the best perks to use, but make sure you guys have your weapon pack opponents to level three.
That's definitely a requirement as well, because it's going to allow you to do a lot more damage to the bosses, as opposed to not doing so if you guys can get your weapon. Pack-a-Punch in the Red Zone: You can always get a pack-a-punch here in the dark ether. Another thing I recommend is an epic or legendary tool for extra damage.

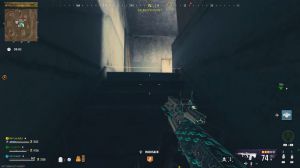
Now remember, when you come in here, you actually activate this seal, and actually, defea feing the warm, you definitely going to want to do this as quick as you can. First things first, when you come in here, you want to go ahead and make your way all the way to the left; this is the first one I like to use, and then basically, when you get here, throw a deco grenade; it's going to allow you to activate this right here, and now Happ is not to worry about any of the zombies interrupting you when you actually activate this seal.
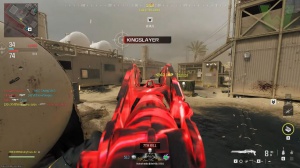
Now from here, the best thing to do, I would say, is make sure you got fire from the hip fire from the hip I noticed it works a lot better than actually aiming down the side. It does enough damage, and another thing you guys can probably remember is that once you fire from the hip, you can actually reload and equip your armor plates at the same time.
From here, you want to go ahead and go to the one all the way inside. Climb right here. I like to use the zip line right here now. I typically like to go to the one on the inside, like I just mentioned. But this time around, we're going to go ahead and lose some of the zombies, and then we're going to go ahead and jump down.

Right here, as you can see, some of the zombies are heading to the one inside because they thought I was going inside, so right there gives me a little bit of space to actually activate this, and then they're going to be heading this way now. I didn't want to use any of my Deco grenads. Now remember, right here, you have to kill as many zombies near the seal as possible so the seal can actually break.
As you can see, the meter is going to be filling up. Now you guys are probably doing this already. If you guys are not able to complete it, another thing you guys want to remember is that, as you can see right here. Remember, these perks right here are very critical. This is why we got this one selected: Jona is going to give you extra health stamina and is going to keep you moving.

And then Quick Revive is going to allow you to actually heal a lot faster. And then Speed Cola is going to allow you to reload faster so that's com in handy, dead shot is going to be for the critical heat damage so we'll be able to do a lot more damage especially to the zombies, and the boss and then we got Tombstone just in case that we be able to recover pretty much everything ex say your backpack and your chest piece and your weapon as well you're not going to be able to recover your weapon so that's a bummer but right here we're going to be heading to the last one we throw a deco grenade and then thing about this one is that we're going to be seeing little bit of bosses in this one mini bosses, things like The Mangler the disciple, they're going to be doing a little.

A little more damage than some of the other rounds, you guys, so this one right here, you want to stay steady. Make sure you guys don't panic you're not going to be taking so much damage and remember one thing that you guys can do is while you shooting fire from the hip you can actually reload a lot of people don't know that so if you see that your armor is going down make sure you guys reload remember do not use your self-revive, here you're going to need your self-revive once you get to the boss which we are heading over there right now make sure before you head to the boss you guys be prepared you're going to climb in here and you're going to go ahead and place a sentry gun in here, for the zombies now two things that this is going to be doing you're going to destroy the zombies and that's going to give you armor place now.
I don't recommend you guys going all the way down over there, where the central gun is shooting, just to get armor. This is the reason why you should already be keeping armor from the previous round. You can probably come in here with at least 20.20 to 25 armor plates. The only thing you have to come down here for is ammo, you guys, so once you guys run out of ammo, just come down here with the ammo stash and refill your ammo.

If you see armor plates right next to it. I will grab them, but if you go too far down, if you guys go too far down, that boss is going to eat you, and that's a self-revive right there that you're going to have to use another thing. I want to go ahead and emphasize right here, which is crazy because a lot of people didn't know how to actually do this.
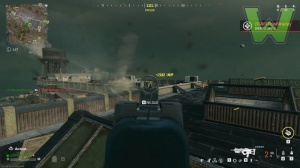
The central gun does not shoot the boss. Keep this in mind, you guys. The central gun does not help you with the boss, which is kind of weird. I think that's something they should be fixing, but right here, you're going to go ahead and expand. Make sure you guys use the strongest weapon when this thing shoots.
Like, open his mouth, and you see some black thing coming out. It's basically these little energy blasts, these energy balls coming out. They're going to be taking your armor out, so you guys need to make sure you shoot it. Turn around as soon as you see him do that. Turn around and shoot the balls.
They're going to come from behind you, too. If you have something like a rocket launcher, an RPG, or this weapon that I was using right here in this course, you can just shoot it to the ground, and he will actually come out so you can see right there. These energy balls are very annoying, you guys.

They're very annoying now. One of the things you guys can do right here is when he opens his mouth and shoots that energy. You can just shoot the mouth, and you actually do damage. You know that way as well. A lot of people don't know that, but you do a little bit of damage doing that as well. But the main thing is shooting his body right there.