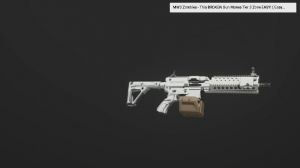
News - Warzone 2 Zombies - This Gun Melts All Bosses. Easy Solo Tier 3 Strategy
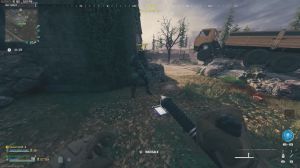
Yeah, we're set, and there we go. We made it to the portal. And there we go, boys. We made it to the Tier 5 zone. As you can see, hellhounds are going to be super quick to kill, of course. Let's quickly run over to this Mega and start hitting a few shots on that guy. Pray that he hits us with a laser attack, which he will.

There we go, beautiful. No, we might go down here. Nope never mind we survived movement is key. Nice, all right. Unfortunately, we couldn't take full advantage of that laser attack because we had a bunch of zombies around us, so let's get that reload, quickly climb up here, and throw that BL very nicely.
Let's maybe take some of these zombies out first. We also have a disciple coming in, so let's drop our energy mine field upgrade. There we go. That's going to take care of the disciple and all the zombies. Keep lighting up that Mega, let it back up a little bit, and get a mimic nearby now too, all right?
We definitely need to climb this wall a few times just to get rid of some of those zombies. There we go, beautiful. Let's come back to this side over here. Here we go. Nice, yeah, so in the Tier 5 Zone, I definitely notice that we're not doing as much damage but definitely still get a N on 10. Let's back up a little bit and think the mom's dead.
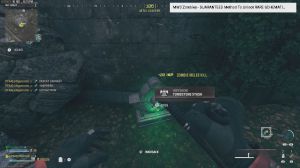
Yes, it is nice. Let's keep hitting those shots on the Mega. We need you to hit us with a laser attack again. Mega Come on, let's pull them back here. Quickly throw the blade at these zombies. It's interesting how the zombies in the Tier 5 Zone don't drop any of the bones; that's odd all right.

Let's keep hitting those shots on the Mega. We missed out on those critical points. Can we hit a few? Yes, we can. Nice, a bunch of zombies coming in, and laser attacks coming in too, which we can't take advantage of unfortunately. Let's take some of these guys out there. Throw that blade again, beautiful.
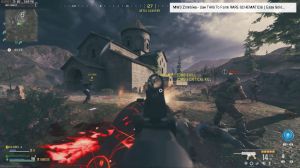
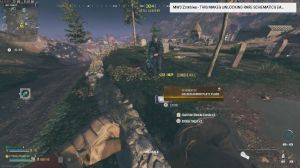
Mega Abomination is almost a quarter dead; let's get a bit closer. Nice, beautiful Let's keep hitting those shots. Let's pull him back over to this green car. I'm pretty sure we can climb up here now. He should hit us with a laser attack pretty soon. There we go. Nice now we can hit those critical points.
Quick and easy. Let's come back here with some more criticals. Beautiful he's got about a quarter of his health bar left. Nice more shots come on, and there we go. Two of his faces are destroyed. We just need one more laser attack. Mega, come on, one more, just one more. We're actually pretty low on ammo, so let's quickly pick some up.

There should be more than enough ammo back here from some of the zombies we killed earlier. Nice beautiful, all right. Let's quickly take out this mangler before he becomes an issue. Mega Abominations are coming our way too; there we go. Mang's about halfway dead laser attacks coming in, beautiful, and I couldn't take full advantage of that because of The Mangler.
It's all good, though. Nice still has a few critical shots in, though it's got a lot less than a quarter of a health bar left. Let's keep hitting those. Now we'll go back on this green truck, and that's going to get him to hit us with a laser attack. Here soon, hopefully come on Mega. There we go.

That's the laser attack we wanted, and, man, he's so close there, so we go get the kill, get a raw crystal off that, and a three-plate. I'll go ahead and pick up the three plates, which are actually all right. Nice, so once you get done killing that Mega, if you're just here for schematics, and I wouldn't really bother killing that Mega since you only have 15 minutes, we have 10 minutes left, so just run along the road and make your way over to this building right here.
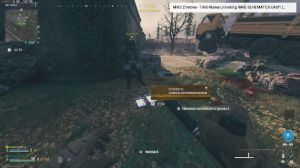
This is an Ammo Depot building. Just climb onto the wall, jump right into the window, and break the glass here. And you can climb up this ladder, and right here you'll find the first contract. That's the Ether extractor contract. As you can see, there's a mega on that side and a few other elites, as well as a bunch of zombies, so jump off to that side of the building to avoid them.
Run up this road here, and you'll find a zip on this wall. This is where you find the first extractor. Once you get up here, just throw a Casmir to get rid of the zombies and the elites that are up here, and just go ahead and disable the extractor. Quick and easy; I think we disabled it. Yes, we did very well.

Once you get that one disabled, run along. This wall here quickly takes out the zombies if they're in the way. Once you cross that wooden bridge, look at the wall up there and throw a casmir at the wall that's going to bounce off and land right over at the extractor and kill all the zombies up there.
That's going to clear your path, and you can just disable the extractor. So that's two extractors disabled; once you get that one, equip your final Casmir. Climb up the ladder. Get on top of this wall right here and throw a casmir right at the extractor that's going to bounce off once again and get rid of all the zombies over here, and you can just disable the extractor.
H did it work. Yes, it was nice. Sometimes it glitches out if, like, a mangler hits you or something. But right there, it worked. Let's see what's in the reward. Rift an extra ether blade case, which is very nice, and the dog bone schematic, which we already have on us, so we're just going to leave that in there; the extra self-revive I'll leave in there too, okay?

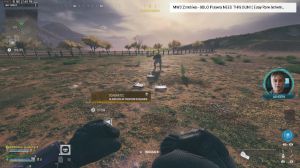
Once you complete that contract, climb onto this wall here and dolphin dive over to this side. Once you get here, you can jump off the wall, and you'll find this green bus, and this is where you find the Outlast contract, so just pick that up; that's going to Ping the PN D. Just run in that direction, and in this corner right here, you'll find another zip.
Make your way up here. Go through these wooden doors and take a left right here, and this is where the p&d is, so just activate that, and now all you do is stay in this room until the analysis progresses. 100% is definitely the easiest contract in the Tier 5 Zone. There's really not much to it; you just have to stay in this room and stay alive.
If you have extra Casmir, go ahead and throw those down from time to time just to clear out some of the zombies; they're definitely going to help out. If you have the energy mine field upgrade, like I do, go ahead and pop that from time to time as well; it's going to get a bunch of kills for you. That's going to kill most of the zombies; some of them might survive.

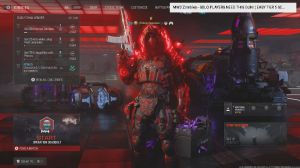
Let's see what's in their napon burst. I'll take another blade case, which I will leave in there. the Elder sigil I'll take yeah definitely got some good loot so yeah pretty successful run in the Elder dark ether here today I'll have to rate this thing a solid 8 out of 10. It definitely performs really well in the Tier 3 zone, and in the Tier 5 zone, you do notice how you're doing a bit less damage, but it definitely still performs pretty well here in the Tier 5 zone, so yeah, overall, 8.5.