News - The Ultimate Guide To Grinding Dark Aether Warzone 2 Zombies
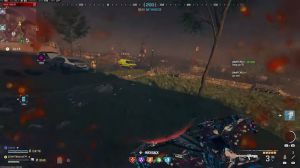
And this is where it all goes a little bit wrong. I go down, and my teammate goes down, but luckily. The contract completes itself, which is a big win. We actually managed to get that completed, and as you'll see from the rewards that we got for this one, I don't think we actually got anything too crazy for this escort mission.
I think it was a little bit disappointing if I remember correctly off the top of my head, so we actually get a tier 2 Pack-A-Punch Crystal, which actually isn't too bad, so I did forget about that one, so we got a couple tier 2 Pack-A-Punch Crystals, and now we've got a legendary A for Tool, and that's just from two of the contracts that we have done.

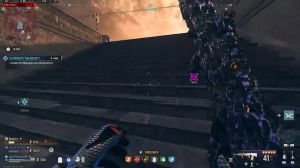
Of course, some of the schematics will come out at some point for you guys if you are doing this, or you'll just get some really good loot to get you guys ready for the next games that you're going into. And as you can see here, guys. I'm starting up the final contract, which is of course the Outlast contract, probably the easiest contract to do in the dark ather zone if I'm totally honest, and I'll show you the exact strategy that I use once I get into that room.
So once it's activated, guys, as you can see, I'm just running around in circles, and I never run down the stairs. I run up the stairs, run to the end, and jump off the balcony. Just before I get to the end of the stairs. I do exactly the same thing over and over and over again, and honestly, this just makes it so basically the zombies can't touch you if there's a zombie doing the stairs and they're watching the stairs do what I've just jumped up there and jumped up the side of the stairs.

You don't always have to run up the stairs. You can jump up the side of the stairs to avoid the zombies jumping off the balcony at the end, so you avoid any coming up the stairs. Very easy to do as you can see, my teammate's doing exactly the same thing, just going in the opposite direction to me.
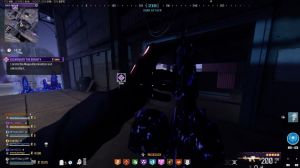
So it is that easy to do this out lash. You can literally stand here; you probably don't even have to. At any point, shoot any bullets; just run around and keep flying around. If you have the dark AA blade case, this is a great thing to have because, at this point, if there are any zombies in the way, you can just throw that at them.
It's going to take out the couple of zombies that are blocking the stairs or whatever. Take them out nice and easy, and you can carry on with your strategy. Of course, if you've got the dark a blade or you've got the golden plate, schematic, or anything like that, loading with those when you're doing the dark a is going to make your life a lot easier because, of course, you're going to get extra plates every time you run over plates or it's just going to regen.

And then of course having that a for blade case is going to make it a lot easier, to take out some of the zombies that are blocking your way as you can see actually come out of the contract here to go and revive my teammate and the reason for this is I don't want my teammate to lose his perks because he's got Quick Revive he's got jug all that sort of stuff and we don't want to be in a position, where if I go down my teammates then don't have Quick Revive so just make sure you're on top of keeping your teammates alive as well if you can because their perks are also going to help you out if you go down later on down the line but as you can see nice quick strategy straight back into the Outlast doesn't take too long we're up at 86%.

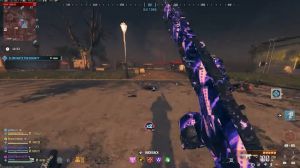
Right now, because my teammate is reviving the other one, and here we go; we're at 95%. Get it done nice and easy, and as you can see, carry on, run up those stairs, and come jump off the balcony. I end up going down there because I just cornered myself; if I had Thea for the blade case, I would have gotten out that nice and easily without too many problems.
My teammate should come and revive me here, as you can see, and I also got the Geo blueprint because that's the first time I've done all three contracts, and it's again just very, very easy to do realistically if you've got a full team. It is nice and easy to do. As you can see from there, we do actually get the a for blade case, which I'm going to Chuck on right now for some reason, even though I know I'm literally about to extract from the dark a, which is kind of annoying, and of course if you guys want to do the red worm you've not done that, you can get extra schematics and extra loot from taking down the red worm, but I think in this case we do actually just extract straight out of the dark ather, so that's honestly one of the easiest ways that you're going to be able to grind out the schematics.

Grind out, get rare loot, and use legendary Ather tools in Tier 2 and Tier 3. AA. I did upload a article pretty recently about the six best guns to use in Modern Warfare 3 zombies during season 2, so I highly recommend you check that out if you are looking for a couple of good classes to use because you're not too sure on what guns to use.
Some of the guns you might be using aren't as powerful as you thought they would be. I definitely recommend you check that out; it's going to give you the six best classes to use, so you guys can mix it up a little bit if you get bored using the same guns, or you can just go and use, in my opinion, the best gun to use in Modern Warfare 3 zombies.
But that is basically all you have to do for the zombies, guys. It is very simple to do, as you saw. We made light work of the contracts; they're really not that difficult to do. Like I said, the only one that is quite difficult is the escort contract simply because the vehicle health will get dropped pretty quickly, and if you're playing solo, it's basically impossible to do because you'll just get overwhelmed with the number of zombies.

You'll probably have to go down a couple times, and you'll probably have to sit there using self-revive. While you're doing that, the zombies are just going to deplete the health of the ACV. So, yeah, I would maybe just not do that one solo, but the rest you can do solo without any problems. Like I said, the Outlast one is super easy to do, and then, like I said, the best strategy for the other one is to obviously just have your decoy grenades ready so you can just throw them down.
You can then distract from everything that's going on. You can then quickly overload. The thing gets done nice and easily; there shouldn't be too many problems, but that's the best way of doing it. If you're enjoying the zombie content, go and check out the channel, because I've got a whole bunch of different content you guys can go ahead and check out that is zombie-related.
Turn, I miss any more times that I upload any more zombie content as well. Have a great day, and I will catch you on the next one in a