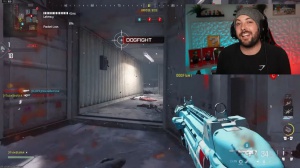
News - Rio Warzone 2 Ranked Play Spawn Guide

P1 spawns
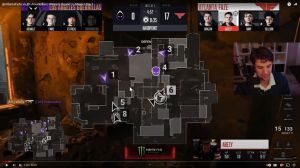
YouTube what is going on crowder here aka the Atlanta face head coach and I'm here to help you out with the real hardpoint spawns let's get into it and okay so leading into this map this is my favorite map I do think this is the best spawn system that we have so far when it's just not as crazy spawns still get a little bit wild cuz cod's not perfect but this P1 right here which is dead center you're going to have spawns that happen over here like either in these alleys or just back middle, and then of course on the other side of things this is the P3 side of the map right here and you're going to get the P3 side of the spawn like P4 P3 area and if you just let these arrows kind of play out you're going to see that as all three kills go down you're going to see where the blue arrows are spawning, and then you're going to see as a red arrow dies they will be spawning on this side of the map which is just very simple.
P1 scenario

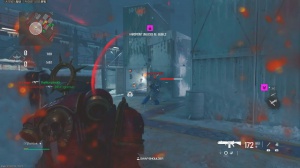
Very easy to read and then of course you have P2 which is coming up over here on the left side so you know you obviously want to try and have this side of the map towards the end of that P1 if you can but pretty simple spawns let's show you an in-game scenario and move on to this P2 , and for the in-game scenario today we're going to be using a gam playay from Zuma just playing rank play it's just very simple stuff Zuma is obviously a very talented Cod player he knows what he's doing when it comes to playing Call of Duty and at this level at ranked it's going to be very easy to kind of see what you really need to do so as we have talked in almost every single article you look up to your mini map and you see where you're spawning, and since you're spawning obviously on this side of the map which is the P2, side you have a couple different lanes that you want to pick up depending where your teammates are with 40 seconds left he has plenty of time to obviously pressure this old Hill which is P1.
And make a play, because of the sole fact that you know they don't have to worry about obviously playing for a certain side or flipping them out or anything like this, so Zuma is going to approach this P1.
P2 spawns

Very simple, and if you just kind of let this hill play out, you're going to see kind of how they go right now, where I was just about to say it can get a little bit more confusing. Sometimes, depending on how you're coming off a spawn on this map, you can see like these weird spawns where like you can spawn in Zig but they can actually spawn behind you, but it's also because number seven over here is kind of blocking this back spawn, so The Blue Team doesn't have too many options of where they need to spawn; realistically, they could either spawn in the Zig area or they're going to spawn behind you over here by like the surf shop back there, so depending on where your teammates are and how vocal you can be, you can definitely read some spawns even though they can be confusing, so this one's a little bit more of a confusion.
Sometimes, but the more you play it and the more like you kind of watch these arrows go out, especially as matches start happening and you have a lot more reps on this map you can get weird, so just everything plays out and it's not as crazy as it probably feels deals in game still going to be a little bit on the pretty stupid side of spawns, but at the same time the more you do you know it kind of calms down so it really just depends on if you get that split in the back if you're obviously blocking that back spawn things can get weird so just keep that in mind when you're playing.
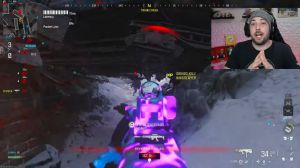
But as this play Hill plays out, you can just kind of see the more and more the arrows get, you know, kind of closer; it's just like they spawn on the front side or they spawn on the back side, and you can also see that six got really far pushed up and he pressures this side of the map that actually causes one of the blue arrows to flip too, so you can kind of see how you can manipulate these spawns.
Pretty simple stuff. Let's move into an in-game scenario and then move on to P3.
P2 scenario

And for the in-game scenario for P2, you're going to have it right here. We're going to be on board. You know, with Zuma's gameplay, he's fighting someone in the middle of the map on the top left. Depending on his teammates' kills, his teammate gets another kill right here, so if you pause it here, if he wins this gunfight, you know they just got another kill; enal gets one; he's about to kill this guy if you're looking at the mini map on the top left, depending on his teammate's communication.
P3 spawns

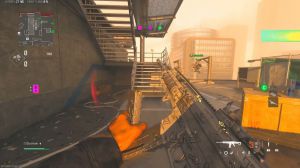
The spawns are also going to be in the basic you know the back over here or you're going to kind of spawn in the front or like kind of get like this pushed up connector spawn depending on it and like you can just kind of see how it plays out depending on how far you push up through the back of the Hill you might be able to actually get a flip but most of the time if you're coming from this side and you're spawning blue or towards like you know the P2, area of this side or over here by the lobby they're just going to constantly, kind of be spawning in the back and you going to be spawning in the front depending on the routes that you're taking, and then you can see that number two is taking your route towards the left cuz P4 is more towards over this side of the map now too which is going to be over here, so that's kind of what you have to think about when you're coming off a spawn.

You know it's talking about what you need to think about. Let's move into an in-game scenario for you on this P3 and then move on to the next hill all right.
P3 scenario
So now let's break down a P3, an in-game scenario from Zuma, and of course you're going to be watching this right now, and they're just kind of playing the hill.

If you pause it and look up to the top left, he has teammates in the back of that P3. So any kill that they're getting they're going to be coming from the top middle escalator side or the left side of the bridge or the right lane which is going to be that zigzag Lane over here which is through the right towards the P4 so remember, the next Hill is P4 which is right to his right so as these kills are going down, and you know they're kind of just trying to keep Hill pressure you're going to watch that all the kills that they got just got if you can kind of look at the mini map right now most likely, since they're not very far pushed up all the kills they did get are going to be kind of spawning pretty deep, and then they're going to know exactly where the next wave of kills is going to be kind of coming from and as their teammates are starting to push up there is now no one blocking that back spot at all so if they do get kills there is now a potential for that flip right so you're going to watch it kind of just play out here they're all going to be pushing up Zuma gets one kill, and as this is you know kind of playing out.