News - How To Make The Best Possible Hrm-9 Class Setup For Warzone 3
Recoil compared
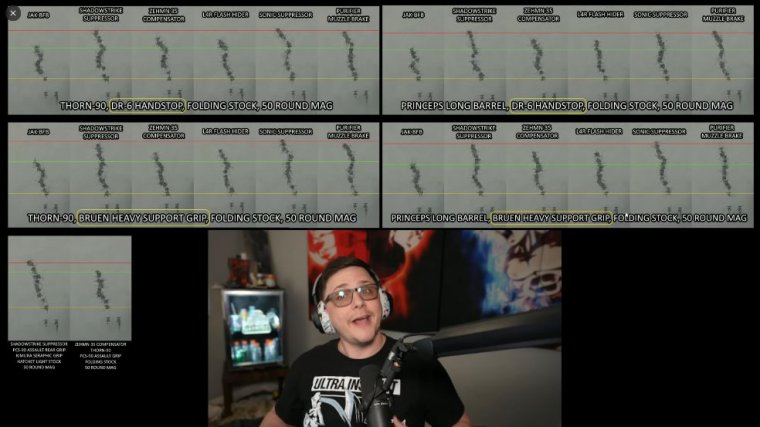
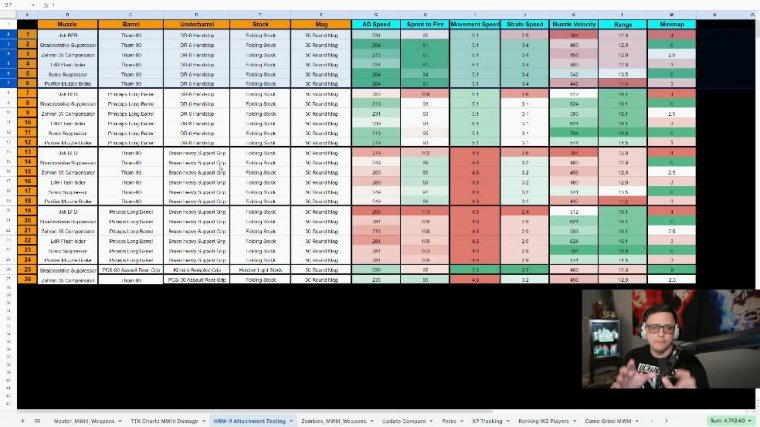
So you get a little bit more distance after that Nerf, but if you want to go all in on Range maybe this one's going to be a good one and you get the Sonic suppressor, but then we have to look at the recoil blot so you got to use that information kind of maybe pick a few based off whatever the stat is that's most important to you and then compare it by recoil and we got a lot of builds like I said if we added a couple more attachments we could have had four times this many, recoil blots but I went in there try to make it as easy as possible to kind of understand what's going on without over complicating even though it can get there pretty quickly but we can kind of see the builds here in this one and the only difference between these two builds here from the top row and the bottom, left row is the hand stop versus the Brewing heavy support, and on the right the same thing the difference between the left and the right is the barrel so this Barrel is different than this barrel and you kind of see what lies out, sometimes you might want less horizontal.
Depending on your keyboard and mouse, there might be other factors that go into it versus the controller. Overall, if we just look at these, we get a purifier. That one looks pretty solid, even though the vertical is not great. You can see it's kind of tightening it up, so maybe that's a good build, and then you'd have to kind of compare that to how it feels in game with ad speed.
Do you feel like you're hitting your shots? Because of those little wiggles. Sometimes that's just enough for you to miss a shot, and it goes from theoretical, which is pretty good, to practical, which is pretty bad. Then we can see that the Jack BFB is still pretty dominant in the recoil department.
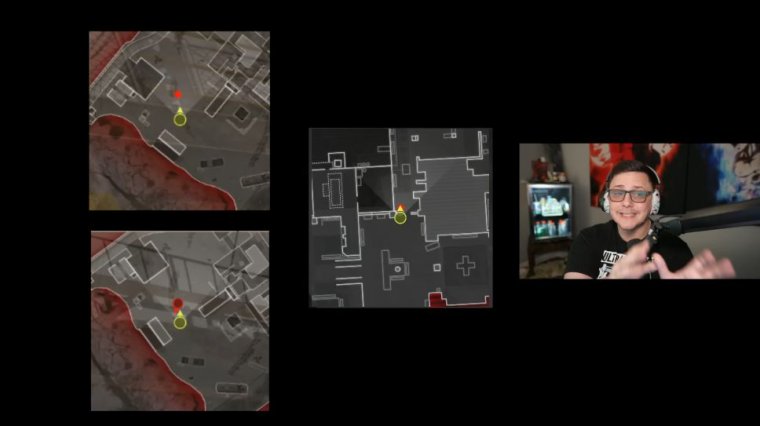
You can see the green line; it's giving us the lowest recoil across the board, no matter what combinations we're using. You can also see that the flash hider on this one is pretty crazy; it almost makes it completely straight. And then we can see the purifier on this one, so that kind of gives me a couple leaning in that direction.
The Z looks pretty good when you combine it on this bottom row with the brewing and heavy support, but again, those are a little bit slower builds. Then we have these two builds that are kind of combined—a rear grip and a true game data build—and you kind of see how those ones go. This one's more the Mobil Mobility build, and you can see that one makes the line pretty vertical and straight as well.
So based on this, what the heck does that all mean? It will come down to what you prefer, but I'll give you a couple of those builds to kind of go ahead and try out for yourself and decide.
Builds and why.
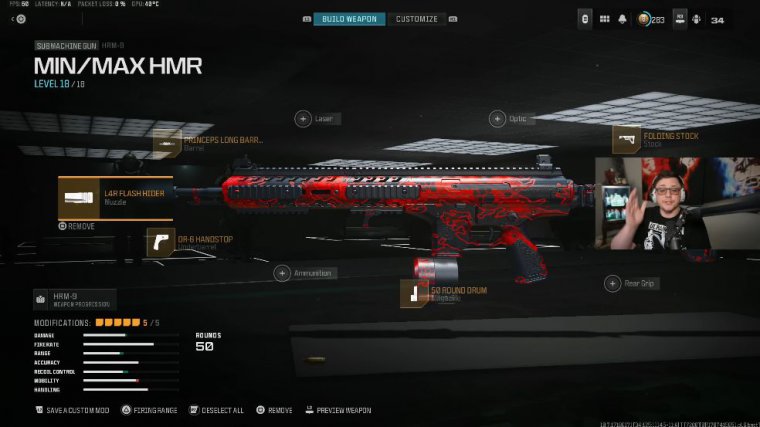
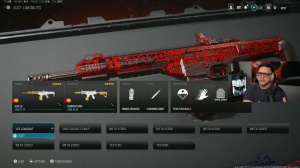
What makes the most sense based on your play style? So this is kind of one that I like quite a bit; it's going to give you those Archangel-style iron sightings.
It gives you a little bit of better bullet velocity, and the L4R and Flash hider kind of straightened out that recoil quite a bit with this build, so overall, this is kind of one I'm really liking based on that. Obviously, it's going to give you that little bit of better hit rag, which I'm kind of a fan of, and you're still able to hit targets at a pretty decent range; you get good sight picture and good visibility.
Strife speed is like everything that comes out of this kind of jack of all trades build, and I think obviously you can get better mobility, lower recoil, probably better bullet velocity, and better range, but this one does good at a lot of stuff, and then if you're going to choose to switch this up because you want to run a suppressor, the suppressor build-out run is going to be with the Sonic suppressor, which is still pretty good.
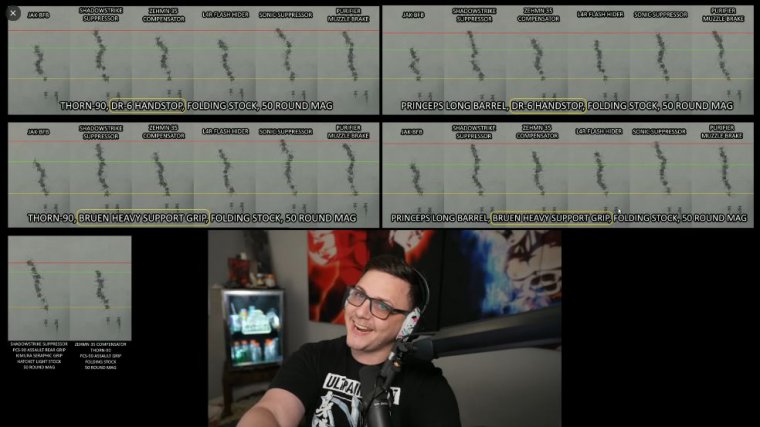
We're going to get insane bullet velocity on this one, even though you're going to have a little bit more recoil than having that one. You're still going to be off the mini map, which is kind of nice, and you'll be able to target that out. And having control that way, sometimes even visibility can be a little bit better when you're having a suppressor on just to be able to see stuff clearer, and then that's kind of how you would utilize this one, and the rag bullet rag on this build is going to be amazing.
Next up is going to be the build with the first barrel, which is that thorn 90 barrel, so we can go ahead and utilize that one, which is going to be combined with the purifier. The range on this one is not going to be amazing. I mean, 11 and a half MERS is not the best, but this one's going to be close to where you're going to be closing that gap a little bit more, getting like 4 M less, which is kind of annoying, but the recoil control on this one is going to be much better.
Outro/final thoughts
With this specific one, especially since it's not getting as much Shake going on those three builds for you, but like I said, the whole point of the article is for you to be able to know what makes the most sense for you based off the information. I appreciate all your support. As always, have a great

 PREVIOUS Page
