News - How To Make The Best Possible Hrm-9 Class Setup For Warzone 3
Explaining attachments/ironsights/recoil/.)
")
Today, we're focusing on the best HRM. Clash you'll need, and this is going to cover various different topics. Obviously, this is one of the most important things. A lot of people ask what's the best, but the reality is there's a ton of good builds, and I'm going to give you the information. Based on your preferences, you'll be able to build the class that best fits your individual's play style.
There are different variables you're going to want to consider, so some things could be as simple as aim-down sight speed or iron sights. What do they look like depending on which barrel you use Sprint to fire time? Is there a big difference? Do you prefer speed or mobility? and then the overall recoil blots.
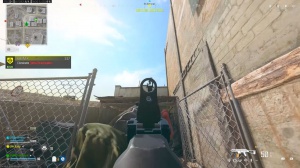
As you can see in the background, this is me testing the various recoil blots that I got in the game. Shoot the wall, load the game, shoot the wall, and then kind of compare these at the same scale so we can kind of get an idea of what is the best. So I went through all that testing with a lot of different combinations, which we'll go ahead and dive into, but I also wanted to give a little bit of a disclaimer.
Around the rectangle blots, there is a little bit of randomness. There is not a huge variance most of the time, but there is a little bit of variance from recoil blot to recoil blot. So realistically, if we wanted to get perfect data when it comes to recoil, we'd have to fire recoil blots 100 times of the exact same build and then compare them and choose a kind of average of how that looks, so obviously we didn't do that for 26 different combinations of attachments.
Is that accurate to a certain extent? Yes, could it be more ?.
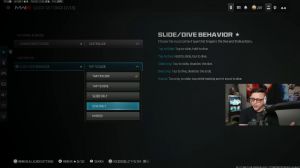
Ironsights

accurate Yes, as well, so we get two different Iron Sights here, so as we can see from the comparison, we have the one on the left, which is kind of like the Basse version or the thorn, and the one on the right is going to be the one you're going to get with the princeps, long barrel, which is going to give you a little bit more range to make up for that Nerf if you want that little bit of extra range and bullet velocity and make up for the Nerf that it just had.
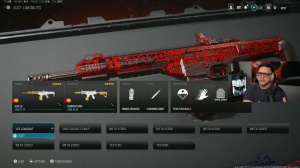
Attachment combos tested and stats compared
So, like I said, we're going to be comparing a lot of data here, and we can kind of see the green and the red. What these are what we can see here is the first section, from 1 to 6. It's pretty much the exact same build of barrel under barrel stock and mag. The only thing we're testing for here is the different muzzles, so we got the Jack BFB, which was pretty heavily nerfed with the shadow strike suppressor.

The Zaman 35 compensator, the l4r, flash hider the Sonic suppressor and then the purifier muzzle brake we kind of see that we kind of SWA that out here different barrel and then same thing we have those but now we're using the brew and heavy grip so we used a various combinations here so keep in mind that for every different attachment we try then we got to add another grouping so if you wanted to try ammo rear grips, we're talking about like a 100 different combinations here so I'm not saying that those aren't valid there's probably tons of them out there but I kind of limited it to the most popular attachments that I think people are using it so we can see here that a lot of these ones here when you use the Brewing heavy.
That tends to slow you down quite a bit. That's kind of the common thing that these ones have here; it also hurts your general movement speed, which in this case isn't a huge difference. AT3, the difference from 4.8 up to 5.1. I'll go ahead and show you a comparison of these side by side to what they look like as well, and then the mobility. We have a Mobility build here, which is actually this one's true game data's build that he liked, so I included that one because the attachments were so far different compared to what a lot of people were using, so I thought it included it because it did have a fast Mobility build, and then on the far right we can see kind of the mini map.
Minimap interaction with muzzles

Issue, so if you fire a suppressed weapon, you don't pop up on the mini map at all. The standard mini map dot is for 3 seconds, and we can go and see the comparison here. 3 seconds is the one on the top left, and then on the bottom left is the Jack BFB, which has the 4C one in the directional. It doesn't move in real time, but if you fire it, it'll show where you're at.
If you move, it still stays up in the exact same spot for 4 seconds, so you can redirect and use this to your advantage, and then we got the Zmen 35 compensator, which only lasts for 2 and 1/2 seconds, so it's actually slightly shorter.
Mobility/strafe speed compared
Now let's look at the difference in movement. So we have Here is an aerial shot using the slowest build for most mobility and the fastest build for mobility.
Head-to-head on the right, you'll see the mobility one isn't a huge difference. Even though it's as slow as 4.8 m/s up to 5.3, there's not a huge difference in terms of overall movement and sprint speed; it kind of neutralizes itself out. The strafe speed, on the other hand, is a pretty noticeable difference, so if we stay on the slower end, which was 2.4 m/s compared to the 3.7, you can see the strafe speed is definitely noticeable at that distance.
Pros vs cons

So when it comes to this, the stuff in red just means that it stinks, and relative to some of these other builds, they might be going for something else, and it's really hard to quantify recoil into just a number, so we'll go ahead and take a look at the comparison there and kind of choose some of the best ones, so a couple standouts based on that you might want to go with this number 12 here, which is the purifier principle.
Hand-stop folding stock with the 50-round mag could be because you get good ads. Sprint to fire is comparable; it's not bad considering the AMR, and the new Ram is pretty dang slow movement still within range strap speed, not crazy bad or slow; it's kind of in the middle there; it will be slower than this Mobility build, and then we get some decent muzzle velocity, which is going to help with bullet Rag and give you a little bit further range up to about 14 and 1/12 meters versus something like a 12.9.