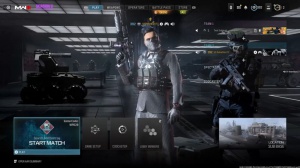
News - Warzone 2 - Spawn Tube Tutorial (quarry)

I'm back with another spawn troop tutorial, and this time we're going to be checking out the map. You know, if you're going to be doing these in alphabetical order like you said, well, you are technically right. I've decided to drop the whole do these maps in alphabetical order thing just because, even though it did give me a structure to work with.
I feel like there's no point holding out on making articles for the maps that you guys pretty much know to be, like underpass, rund down, and so on, so from this point on, there's not really going to be a structure that I'm going to be following. I'm just going to be making these articles based on whatever I feel like should be the next map to make a article on, or if you guys want to leave a comment on what the next map should be.
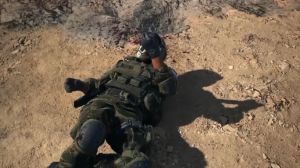
I'll GL do it that way as well. Speaking of maps that you guys probably know to a te quy, is one of those maps? I think most of you pretty much already know how to tube on this map, although there are a few spots on here that I'm going to show you that some of you probably don't know about. I could be wrong about that, but regardless, I hope you guys come out of this article learning at least a new spot or two at the very least. So with that said, let's go ahead and jump right in , beginning on the attacking side.
Attacking spot 1

I have four spots to show you. These will cover a majority of the routes that the Defenders take at the beginning of the round: one that goes to the left side by the bomb, one that lands directly and the defender spawns, and two that go on the right side, one that lands by the conveyor belt, and one that lands on the side of the B building.
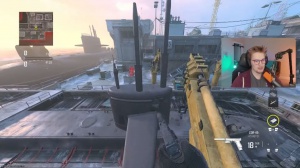
I'm going to start off with the tube that lands directly in the defender spawn. This is a great way to tube anyone who's AFK, or tube anyone that's trying to tube you back, for this spot's pretty simple; you're just going to back up slightly like so. You are going to line up your tube next to the yellow railing on the roof, just R up across the air like this, and just start spamming in there.
Attacking spot 2

Spawn For the next spot, I'm going to be showing you how to tube towards the conveyor belts that lead up to the side doors. For this spot, you're going to come over here and lean up against the edge of this door, going to line up your dot just to the right of the corner of the building in front of you, just like so, and just start spamming toward the conveyor.
Attacking spot 3
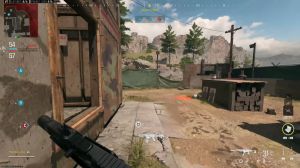
Bone In the next spot, I'm going to be showing you how to tube the right pathway that's on the outside of the B building. For this spot, you're going to run back here and stand on top of this cone, look towards the corner of the building again, just line up with the very corner of it, and then just start.
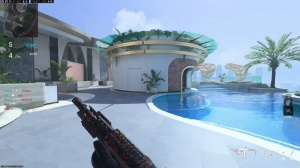
And for the last spot, this will have a tube towards the left side. Landing right in between the warehouses with a bomb, you will now need an underbarrel tube for this spot, so make sure you have this equipped. What you're going to do is run slightly out of the doorway in Your Spawn. You're going to look up at this hole in the sky.
Defending spot 1

Left , now switching over to the defending side. I'm going to have three spots to show you on this side: one tube that lands to the right of their spawn, one red car that lands to the left of their spawn, and then one that lands directly in their spawn. I'm going to start with the first one, where the tube lands directly to the right of their spawn by where the red car is.
Now this spot doesn't need a whole lot of explaining because it's basically the same way of tubing in the old game, and I'm sure most of you guys already know how this works, but I'll still explain it to you in a little bit of detail, so depending on where you're standing, it shouldn't really matter where you're standing.
Basically, you want to aim towards the direction of this crane, and then you want to have the bottom crosshair somewhere near the top of that crane, so something like this is the perfect lamp to have, and once the round starts, start shooting. For the next spot.
Defending spot 2 (method 1)
")
I'm going to be showing you how to tube the pathway on the left side of their spawn, and there's actually going to be two ways to do this, and I'll be showing you both of those right now. For this method, I do want to give a shout out to Jaden; he is kind of the one of the first person to actually use the spot that I've seen, so again, credit to him.
If you spawn more on the left side of the team, like where I am right now, then I would recommend using the wall to the left right over here. What you're going to do is lean up against it, aim in between the middle of the windows right here, and look up. And you want to have your dot about this much distance away from this home in the cloud, so right about here.
I would say it's a little bit of a rough estimate, but the more you do the spot, the more you'll get used to it, and yeah, once your lineup looks pretty much like this, you're going to do what I'm going to call the moonwalk method. I totally didn't just make that up right now; it's basically like the fadeaway method but without the jumping portion, so you're going to move forward slightly and then walk backward, and then you're just going to shoot your tube each time as you're walking backwards, so it's going to look like.
Now let's say you want to execute the same shot, but you're on the right side of the team. Obviously, going over there is a little bit further away; it's going to take up too much time, so you're going to use the pallet method, where you're going to lean up against the pallets to the right, then you're going to look towards the smaller hole in the cloud, which is right here.
Aim a little bit below that, so right about here, and then you're going to again use the moonwalk method. You're going to move forward, move backward, and then shoot each time as you're moving backward, and just repeat like that.
Defending spot 3

So, and for the last part, I'm going to be showing you how to tube directly into the attacker spawn. This is a great way of trying to tube anyone that's trying to tube you back or anyone that's just AFK. For this SP, you're going to run over to the left and lean up against the corner of this block.
You're going to look in between the two railings right here on top of this building, going to aim upward until the top crosshair is lined up with the top part of this opening right here of this cloud to the right, so your shot should be lined up like this, and then this will land directly in their spawn.
Outro
And that's going to conclude this article. You guys know what to do. If you liked this tutorial and found it helpful, give it a thumbs up.