News - Easy" How To Complete All Season 1 Week 6 Multiplayer Challenges Warzone 2
Introduction

I'm going to show you exactly how to do these challenges, which are literally just two to three games. If you guys can just pay attention for 6 minutes and watch this article all the way through, I will literally save you hours of game time, so lock in 6 minutes and let's go.
How to be efficient with weekly challenges
Okay Guys, these challenges are all fairly simple in my opinion, but the only thing we're going to struggle with is maybe the point blank kills, but I'm going to show you how to do that for our AM-9 class.
I'm going to make it so you can do five challenges at once: we're going to do hipfire, we're going to do double kills, we're going to do point blank kills, we're going to do the kills while moving, and we need three kills without dying. We're going to do five challenges, all together in one single game, and then we'll do the last two LMG challenges.
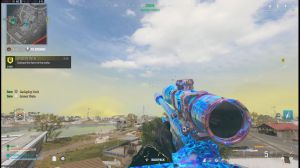
The best amr9 class setup!

Okay So before we can actually get into the gameplay, you guys need the best class setup possible, and that's what I'm going to show you guys right now. Maybe subscribe if you want more articles like this, but regardless, the AR9 is the submachine gun. We're mainly focusing on damage sprint to fire speed and speed hip fire accuracy, and that's what this class setup accomplishes.
We are sacrificing recoil control because it's hardcore; you don't need to hit many bullets, so you're not worried about recoil. You're going to die before you get the Flinch anyway, right? And then the handgun doesn't matter, but I love the core 45 stunt grenades, or flash grenades, whatever you want.
The trophy system is huge on shipment, especially when you couple it with an engineer vest because you can throw more and more quicker, and then assault gloves for those extra ads while jumping if you want, and then tactical pads are huge for hardcore guys. I preach this all the time because your slide velocity is faster and you can actually advertise.
While you slide so you can break people's cameras, it's much easier to go around corners. This perk is huge. Use these over-covert sneakers on shipment 100% because no one's going to be able to hear anything anyway, right? You're dying too fast, and then the Tac mask and EOD are standard, all right? Use this class.
(one game) all amr9 challenges completed gameplay!
 all amr9 challenges completed gameplay!")
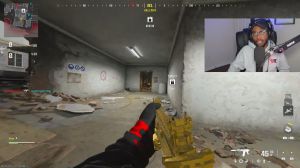
all right Step one, guys, is to go into the hardcore playlist and just select Rustman 24/7, and I want you to back out every single time from a lobby if it is not shipment dominance or shipment hardpoint. I want you to get into a brand new Lobby, get into the game and right off the bat we do have a clip so Watch What Happens so we get a kill while moving right there and then I go around the corner into the Container get hipfire kill right there get a double kill get a point blank kill and that satisfies, also the three kills without dying so we literally just did all those challenges right there okay continue on so when you play objective this happens more often I get double kill you know people are coming for the objective that's great then after I get the third kill for the three kills without dying and I die right here and then I get a terrible spawn he spawns right in front of me but I'll take it cuz that's another point blank kill I turn the corner.

I get two kills while moving and HIIT fire kills, and I complete this challenge, guys, so you're going to get these challenges done just by playing normally. Okay, so for an important message about point blank kills, pay attention. You must basically be touching them and touching the enemy in order to get point-blank kills.
That kill didn't count in the previous clip kill didn't count, this one does. As you can see, it pops up in the kill feed. It says Point Blank. You basically need to be touching them in order to get the point across, so do not make that mistake. But overall, guys, if you just use the class up I gave you—you run around, jump, hit fire, get your kills, flank behind objectives, slide in using the tactical pads—you will get all these challenges done, and you will get the point blank kills done.
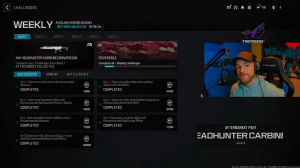
I promise you, you will get this done in just one to two games, and now if we back out to actually look at our results, you can see we go to challenges; weekly we're going to go to week six. You can see I almost completed all five in one single game; we were just missing three point blank kills, which we can just do in the next game with the LMG challenges, so let's get into it.
The best lmg class setup (taq eradicator)
")
Okay guys, so moving on to the lmg challenges, you know I'm going to cook up a really good lmg classer for those AM9 challenges, really fast, so you know I've got you here, so Deployable Cover, we're going to use this as our field upgrade because we can hide behind it for our reload kills, and then obviously for lmg.
I'm going to go with the tech eradicator; it's my favorite and reminds me of the SCAR H scar. The main thing I want you guys to focus on is reducing the magazine for whatever LMG you guys choose because it gives us a better reload quickness time, which is fantastic. Now you guys can pause the article screenshot of this class setup.
Use this class.
Lmg reload kills tips & tricks gameplay!
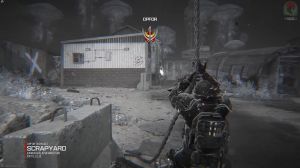
And with this class set up, we are going to first look at the reload kill challenge. This window for the reload kill is actually quite forgiving, so don't worry about it. Use the deployment cover to your advantage. I just shoot, use the cover, peek up, and get my kill, and that counts as one.
I almost had that guy, but I choked, and then this one—I just know they're over there. They're trying to use that to my advantage. I get another reload kill right there, and it actually completes the challenge. Don't make it too hard, right? Don't make it too hard. Use deployment covers to hide behind containers, whatever they may be for.
Lmg double kills tips & tricks gameplay!

The double kills challenge, guys, for the LMG: two tips Use the objective to your advantage. Camp around it. You know you can get double kills that way since people are going for the flag and the hardpoint. Priceless, that's cool.
Other than that, you can also use deployment cover to aim down Alleyway, so I get a kill there, and then this guy right here has a bad spawn; that's not my fault. I don't care; I got my double kill now on the flip side, where we have A and we don't have B and C. I get a double kill shortly after reloading—two birds with one stone.
I get flashed and I die, but I satisfy the challenge, so please use those two tips to your advantage for those double kills.
Important message (you should watch)
and lastly, guys, to finish up, I did the point blank kills like I said: flank around the objective, get your point blank kills that way, and I have satisfied that challenge.
We are done with all seven challenges, and remember, I post these articles.