News - Cod Warzone 2 Zombies, How To Kill The Red Worm (greylorm) Solo Guide

The red wall is the most difficult boss fight in the game so far, especially for solos, but it is also a key for some of the best schematics to acquire the legendary ether tool, the Flawless Crystal, and the Scure Wonder weapon, which means you simply have to do this, and this guide is to show you how Even if you don't have a solid team to do it together, let's start with the basics.
Since it's a really hard fight, you do need your best stuff for it. All the nice things you may have in your stash by now are waiting for that important moment to be used well. This is that moment. Golden plates are almost a necessity for this mag of holding, which is extremely helpful, and ether blades will make your life much easier during both the prep and the fight.
Dogs are pretty much a must, ideally more than one, but we'll get to it in a bit. The metal weapon for the red warfight is still a Kimbo WSP swarm, but only if you have a legendary tool to accompany it. If you do not, you are better off buying a legendary AR or lmg in the round from the wall in the Red Zone than you are with any matter of lower rarity, and your gun of course will need to be punched three times for you to stand a chance.
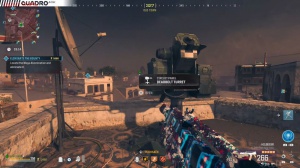
You'll also need sentry guns with you since the current limit is three sentries per person active at the same time. That's precisely the amount you should get in the round as you prepare for the fight. The final crucial thing is a durable gas mask. Find one or buy one; without it, the whole thing becomes a pain.
Selecting the fight location

That's the basic equipment set you need to get through the fight, so let's look at how we play this out. First of all, you need to make sure the location for the fight is suitable. There are a total of four fighting areas for the red W heals in the D3 grid and the stadium in the C5 D5 grid in the medium thread zone, then areas in the H3 H4 grid south of Orlo base and the I6 grid east of Hamza Bazar in the low threat zone.
You really want to make the fight in the low-threat zone. You may think that medium threat is all fine, but the fight takes place during The Ether Storm, so all zombies are getting upgraded by one tier and then get extra Health B on top of that. So taking on the red warm in medium threat makes everything even more difficult, and you really don't want that, at least on your first fight.
As you fill the round with a backpack full of goodies, before you use any of that, open your map, locate where The Ether Storm is, and look for the closest farting area to it. It can be easily recognized by two Amo caches located weirdly close together. What you want is the fight area in the low thread zone and the storm reasonably close to it, so you don't have to waste precious time waiting for the storm to reach it.
If the location is not suitable or the storm is too far away, proceed to the nearest xfill without using your gear and infill again until conditions align correctly. Don't get too angry if you need multiple attempts to get a suitable set-up. The weight early on is well worth it compared to the frustration of getting murdered by the heat and losing all your hard-earned stuff.
To get the footage for this article, I had to fill an XV seven times, but it's no secret that RNG generally hates me.
Getting help and finding usbs

When you do get the map you need for the fight, it's time to arrange some backup. Get into a safe place, like on the top of a crane or a tower, and send a message to the server, like, anyone for the Red War, and I'll get the USBs. The fact that you come in solo doesn't mean that you have to fight it alone.
The red W is the case of the moderator, so make sure to let others know. Do mention the USBs to let others know that you know what you're doing and that you're going to put all the hard work on you. If you don't get any responses, you may want to XO as well, saving your items for a better chance.

If you do get responses, confirm to others that you are the one getting the USBs and that the easy part is finished. Now you can go ahead and use your items, except for the dog bone. If you brought one, save that for backup and collect three chunks of flesh to get a regular tier. Three Dogs instead of your dog being born is for when your first dog dies, which is almost 100% probability, so while people are preparing to participate in the must suicide with you, you need to get those USBs we mentioned already.
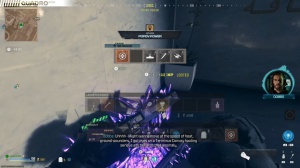
These items are required to summon the wall and need to be collected on the map during the match. You can find the USBs in one of two ways. The first one is to visit one of the four map rooms located on the map. I'm showing where they are on the screen right now, but you can check those locations on WZ HUB G at any time in your own rooms themselves, so just go to the one closest to you in the rooms, and you'll see four overhead photos showing you the areas where USBS are located.
If you know the map well, you'll likely recognize it without even having to look long, but you can also check online maps for the same. There's a total of 12 locations where USBS spawn: three in the red, four in the yellow, and five in the low thread zone. One of the USBs will always be in the red zone, with one or two in the medium and low thread zones.

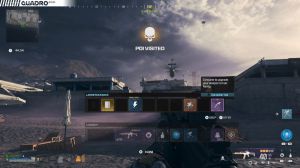
You can now visit each of the locations to interact with the UAV station and collect each USB stick. Alternatively, since there are only 12 locations where those can spawn, you can skip the visit to the map room all together and just visit each spot. I personally prefer to know where I'm going, so I do check the map room, but it's totally up to you.
The key here is to make it as fast as possible, so you have as much time to prepare for the fight itself. If you're playing in a squad, it makes sense for one person to go around and collect the USBs while the rest of the team pumps up the contracts and amasses some. Cash and those cons have been there, and we investigate and report.
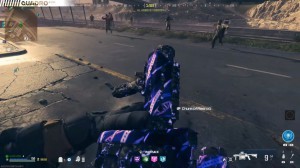
That is all the critical data we needed. Excellent work once you collect all the USBs. Use your high-rarity High Pack-A-Punch gun on one of the low-threaded xill zones to farm three chunks of meat as fast as possible. Use those to get yourself a tier. Three Dogs in the Red Zone If you are in a squad, having each player get their own dog will be extremely helpful in the process.
When you get the dog, proceed with spamming the contracts as fast as you can. Chances are, at this point, quite a bit of time has already passed in the round, and you want to maximize your cash to make sure you can buy all available perks. Have your three sentry guns and feel whatever is left of your inventory with self-revival.
Keep an eye on the round time, though. You want to be at the fighting ground when the storm starts expanding, so account for any travel time you need.