News - Cod Warzone 2 Zombies, Shepherd Solo Mission Guide (act 2 Story Mission)

It's time for the story mission in Act 2: The Shepherd, and as usual, we begin with a prep in terms of weapons. The choice here is the same as for the Act 1 story and RGL. At the minimum, you want your rgl to be at Blue Rarity and punch two levels, but Epic Rarity and Punch 3 upgrades will make you run an absolute Breeze to accompany the rgl.
You absolutely need the PHD Flopper and Speed Coler perks; other perks are welcome too, especially Jugger Knog and Stamin Up, but it's the PHD and the speed that are essential. On top of all that, you want a selfie, a spare, and several sentry guns. Those are not absolutely required, but they do make the run much easier, especially if you have three or more of them.
Luckily, sentries are cheap at just 2K a pop, so they shouldn't be an issue. Whether to take a secondary weapon at all is totally up to you. I usually just bring the RGL, as it's more than sufficient, and pick something up on the map if I see a nice, high-ranking weapon. Once you feel like you're ready, head over to the mission icon marked Shepher and call the XFI chopper at the red flare.

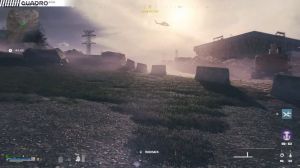
Board the helicopter to be taken to a version of Leevan Resort, where all the action is taking place this time. After a short flight, you'll be able to leave the helicopter and use your parachute to fly towards the main RES building, leaning left. Once landed, proceed on foot, keeping to the left side of the main entrance.
Two mission markers will point you to the zip lines in the main building, but you don't have to go to them. In fact, there's a whole lot of mercenaries right where the mission markers are, and you can avoid fighting them all together by using zip lines on the outside of the building. There are mercs on the outside too, so try not to rush too much, as they heat up quite hard and can melt your armor very quickly.
Take out any that threaten you as you make your way to the first, Zip. Once up on the first level, there'll be two mercenary snipers who are quite annoying. You can kill them or just run around the corner for the main zip line that takes you all the way up. Make sure you are fully plated and your weapon is reloaded before taking the zip.

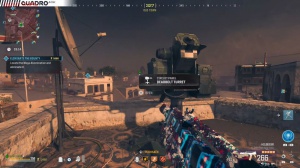
Once you get on the roof, you'll immediately face a number of mercenaries, and they will likely be quite unhappy about your visit. Get your RGL to work until the immediate threat is removed. Don't bother trying to clear the whole area completely, as new reinforcements will keep arriving nonstop. You'll find yourself next to one of the sides that you need to destroy.
Run up to it and interact to place an explosive, then run towards another one, using the structure in the middle as your cover. Keep killing the merks that push you and make it to the second s. There's also a dead bolt turret on the roof too, so if you have any turret circuits and fancy it, use one and it will keep the whole area clear for you, but I personally find it faster to just blow the S sides up quickly and then.
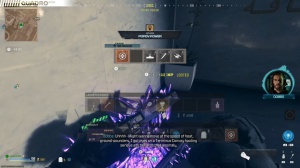
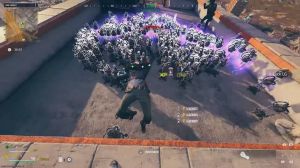
The prototype is in your air, and your arrival is imminent. A few mer will spawn shortly, followed by a couple of zombies who will kill them quickly as the reinforcement healer with more mer is coming. Already, all stations have locked down that drop. Once you deal with that threat, a large horde of zombies pops up, and you need to take care of them as well.

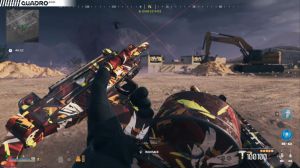
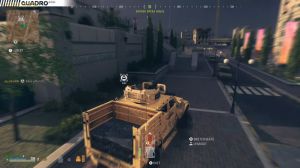
RGL should splatter all that very quickly. Once you've cleared the area, you have the option to activate the ACV. It's also usually, though not always, there's a buy station nearby. You can use it to buy any additional selfies, sentries, or plates that you need. Once you're ready to activate the ACV, jump on top of it and put your SES down, leaving one in reserve.
The trip in front of you is longer and has more enemies than any escort contract, so the S will expire somewhere at the end of it, right on top of the ACV with your rgl. Regular zombies cannot really damage the ACV as long as it keeps moving, so don't worry much about them. Concentrate your fire on special zombies like manglers, disciples, and mercenaries.

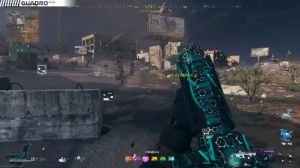
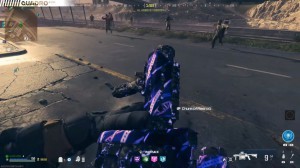
Be a bit mindful with your RGL fire, as it can and will damage your own sentries, so lend your shots further away from the ACV. Try to stay on your ACV as much as possible since the moment the ACV stops, zombies will immediately start hammering it, doing some crazy damage, and you really want to avoid it if you're on it, though they can barely scratch it.
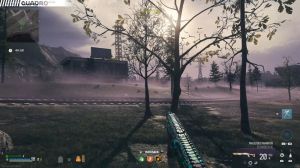
If you go down, the ACV keeps moving, and zombies actually deagro, giving you quite a bit of a breather. Either way, stay in the vehicle. Jump off to collect plates, and then jump back and keep spamming your RG. That's the gist here; the whole drive It takes almost 4 minutes as you go from the Le Resort front yard around the building through the construction zone behind it to eventually arrive on the loan by the [__] riddled with ether.
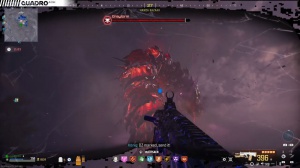
The good news here is that the mag is also tier two, just like all other zombies in the mission, so it has significantly reduced health and is overall weaker than its Red Zone variant. You may also notice a dead bolt turret not far away. Don't start celebrating as if the cake is a li; it's just a mimic waiting for you to fall for a trick.

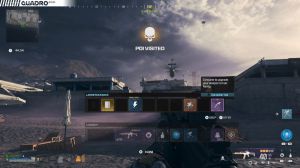
Neutralizing the charging process only takes a minute, during which you need to make sure it's not destroyed. Spamming grenades at and around ACV with your RG works really well for that. Purpose: Once charging is complete, you'll be asked to detonate the neutralizer, run up to it, and interact with the panel at the backside.
The detonation will kill any zombies that are still alive, and the missal ends with the cinematic. As before, you can't skip the cinematic; otherwise, you'll fail your run. I hope this was helpful.