News - Cod Warzone 2 Zombies, Defeat Zakhaev Solo Mission Guide (act 3 Story Mission)

The story mission of Act 3: defeat Zakay takes place in the off-map version of Papov Power Station, so similarly to other story missions, you have a full round to prepare, and prepare you should. First, let's talk weapons. The absolute matter for this mission is a Kimbo WSP swarm. If you have it fully leveled up, that's great.
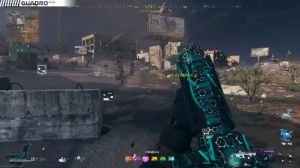
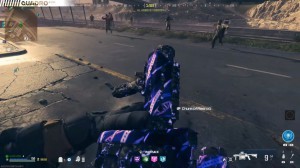
My build is on the screen now, but some parts of it are more important than others. The absolutely required items are the conversion kit, WSP Aimo Brace stock 100-round drum, and high-grain rounds. The choice of barrel laser or muzzle is up to you. I prefer the ruthless barrel and Heap Shot L20 laser, but there are many viable options.
Here If you don't have the gun fully leveled, that's also not a huge problem. The conversion kit and armory unlock, so the level doesn't really matter. The magazine category unlocks at gun level 7, and ammo unlocks at level 16, at which point you can unlock specific required parts via armory challenges.

To If you absolutely don't want to level up the swarm or just don't like using meta to purchase a legendary weapon off the wall in the round, you'll want an AR or LM, as good range is required. AR is preferred here for increased mobility. If you are bringing a Kimus SWS epic, rarity is sufficient for the mission; of course, legendary is better, but I would keep the tool for later unless your stash is overflowing anyway.
During the round, do a rather standard prep spam contract to get cash perks and useful items. Use the cash to pack and punch your primary weapon all the way to level three. You'll need it to stock up on perks, especially speed, Coler Juggernog, and stamina. Also, have several spare self-reviving lilies with you.
While the mission is not super hard, accidents happen, and you might find yourself down. I've had people praise the dog in the mission, but I can't really verify it. I had particularly bad luck bringing the dog in. On one occasion, it was killed by the Landing Xville Chopper. On another occasion, it spawned in Mission H once and exploded in place, so I didn't try anymore.
The last hint before we go into the mission itself is that when using a Kimba swarm, unless you shoot a boss or a large crowd, use only one gun at a time; your damage output at punch three will be sufficient to kill anything, and when shooting just a single gun, dual swarms have literally no recoil to speak of now. Once ready, navigate to the mission marker on the map, call a chopper at the red flare, and off we go to Han K.
Mission walkthrough

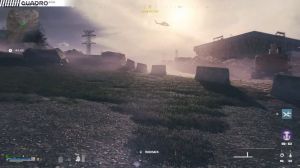
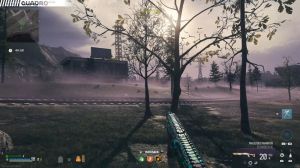
As always, after a brief flight, you'll regain control and jump off the helicopter onto the shore. Do not; the path to take to the Mission Market doesn't really matter much. In my observation, all of them are more or less the same, but I prefer to lean right, just close to the map border, because it offers a more convenient entrance to our.
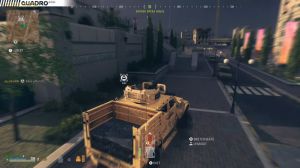
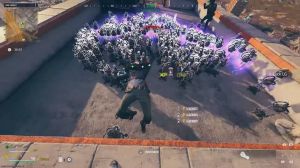
Objective: As you cross the concrete fence, you'll notice containers spread around, and after a short warning, beep locks on them start blasting off, releasing waves of zombies and mimics. You don't have to clear them all, but you also shouldn't leave a full horde chasing you, so mow the most enthusiastic ones down and keep running.
Definitely kill mimics, though, since they can be. There are a few soldiers inside and two or three snipers up the catwalks; those are very annoying, so move around until you're ready to kill them. There's also a buy station in the chamber, giving you a good chance to buy any missing items like plates or self-revivals.

You can expect that to be explosive. As soon as you do that, a new mission marker appears pointing west. Start making your way there. There's a lot of enemies, both merks and zombies, all around again. Try not to engage too much with them unless you have to keep moving towards the target, clearing enemies that block your way.
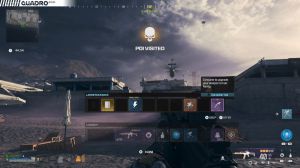
You'll quickly see that reinforcement helicopters are already hovering at your destination, so once you arrive, there'll be plenty of Mer around those you are better off clearing, as it just makes your life easier. Shortly after, a heo arrives with two of your NPC allies, Dos and Dr. Jensen, who will help you clear a bit, but they are still bots, so don't expect them to do too much work for you.
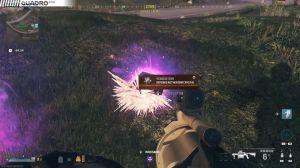
There are two buy-in stations here as well; use them if you need anything. This is, more or less, your last chance to do so. Once ready, power up the neutralizer by interacting with it. Your objective now changes to destroy the helicopter, and an attack helicopter will conveniently come in alive.
Team ter is Clos there, locking onto the neutralizer. Take them down. Don't bother fighting it; you can't really kill it as it's fully scripted. Instead, while it's flying around, make your way to one of the warehouses nearby that's going to be your base of operations for the upcoming sequence.
Boss fight

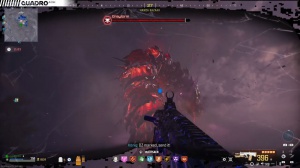
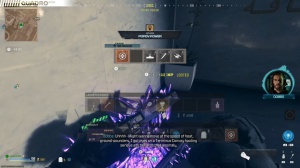
Now observe the warm air emerging from the ground to eat the chopper; unfortunately, the beast decides that the chopper is not enough and it really wants you for the dessert, so it has to die.
Start shooting the W, trying to hit the glowing parts of its body for critical. When you see the warm straightening and raising its head move into the warehouse for shelter, that means the warm wants to either blast you with its laser attack or try to snatch you off the ground and eat. Both are pretty bad news, so rather hide, and once the attack is over, run out again and keep.
You'll notice that your swarms eat through the ammo at a crazy pace, but conveniently, there's a number of ammo caches, with one positioned right in the front of the warehouse. After a little while, zombies will start spawning regularly to provide you with extra plates and ammo refills. These delivery guys are quite annoying, so do shoot them.

A very usual scenario is zombies blocking your way just as you're trying to back off into the warehouse when Orcus uses his laser attack, so keep checking your back every now and then. If the WM catches you in the open and eats you, you keep shooting inside the bastard while spamming your jump button nonstop.
When he eventually speeds you out, you won't have the time to open your parachute and will go down if you're not constantly pressing the jump button. At this point, Orca starts using an additional attack, launching purple orbs that Chas and damage you. These are a serious pain in the butt as they move fast, heat hard, and are rather difficult to aim at as controllers AES don't register them as targets.
Shoot those at your first chance; they are one