News - Cod Warzone 2 Zombies, How To Unlock The Second Dark Aether Rift, Solo Guide

In this article, I'll show you the process of upgrading the items you got from the Counter Measures Mission and unlocking the second dark ether Rift. If none of what I just said makes a lot of sense to you, you may want to watch the countermeasures guide first, as it explains how to acquire the items and, in general, is a prerequisite to being able to unlock the rift.
The good news is that no special preparation is needed to upgrade your items, as the process is easy and quite fun, and all of it takes place in a low-threat zone. Upgrading the items can be done in any order, so just choose the one closest to your spawn on the map.
Tattered mma gloves

In my case, I start with the MMA glove first. To upgrade them, you need to travel to the gym in F8. Grid, the target building, is hard to miss. It's the only large building in the quadrant and has a pool and tennis court outside of it.
Inside, you'll easily find a boxing ring. When you get into the ring with unupgraded gloves in your inventory, you'll see a prompt to offer a tuned replica. Do so, and the screen will shake briefly, and seemingly nothing else happens. Jump out of the ring here and use your melee attack on three of the boxing bags on the west wall; they will catch fire as you hit them.
Now get back into the ring to find a glowing zombie. There, beat the zombie up with melee attacks until he's dead, and fully upgraded MMA gloves will spawn in the center of the ring. Not that you have to kill the zombie inside the ring, as they don't seem to take any damage outside of it.
Perforated target

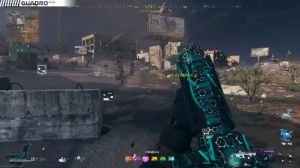
The next item to upgrade is a perforated target, as it's really close to where we are. If you paid attention to your surroundings while playing, you probably already guessed that the target belongs to a shooting range located in H8.
Git, head over there, walk inside the range area, and you'll get a prompt to offer on tuned Relic again right next to the closest Target. Doing so will spawn eight targets on the wrench and in the surrounding area. As far as I can tell, these always spawn in a fixed location, so just follow the article to find all of them.
These can be done in any order, but I prefer to shoot those in the immediate vicinity first, leaving the target in the tactical area for last. As soon as you shoot the last target, a glowing zombie spawns, and it needs to be killed with a head shot. Doing this spawns an upgraded target. If you take too long to kill the zombie for any reason, it despawns, and the sequence will have to be done again. You do not lose the unupgraded relic, so don't worry about that; there's no.
Pristine mirror

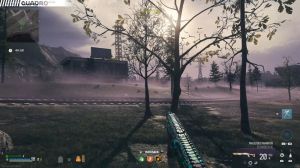
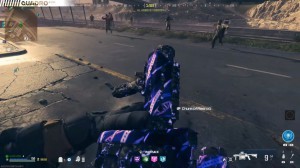
Pressure, the last item to upgrade is a pristine mirror, and you need to head over to the monastery on the edge of H3 and I3 grids, annoyingly. Quite often, there's a mercenary camp there, so you'll want to clear it first before proceeding with the upgrade.
It, Offer The relic will spawn a zombie. The zombie will have a glow matching one of the elements: flames, icy heads, electric sparks, or green toxic smoke. Behind you, a structure will start glowing, and inside of it you'll find four panels with each element's ammo mode, just like at the Obelisk, where you found the mirror in the first place.
Take the matching ammo mode applied to the gun and kill the zombie with it, and you get an upgraded priest mirror. The zombie is immune to other attacks, so if you don't seem to be able to kill it, you chose the wrong element. After a while, it will disobey if not killed, but you can do the offering again and again and repeat the process until you succeed.
Portal and the boss fight

Now that you have all four items, you can unlock the second dark ether rift. I recommend having an epic punch 3 weapon for the next stage and one or more self-revives since you do have to fight a mini-boss in the Red Zone.
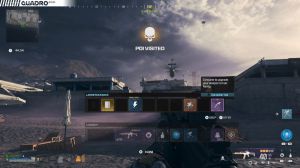
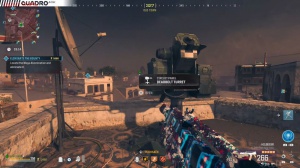
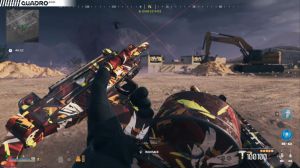
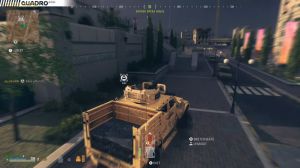
The boss is not too strong, and if you don't feel like getting geared up for it, buy a sentry gun or two; they will do the work easily. Once ready, head over to the top of the hill in G4 Grid. It's kind of hard to miss since there's a huge black tornado right where you need to go. When on the hill, look for the pedestals with images that correspond to each of the items.
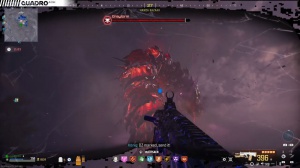
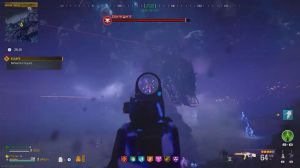
While doing so, keep your eyes open. While zombies don't spawn right in this area, they can still attack from nearby locations, so make sure you're not caught off. Guard, the pedestals are spaced quite a bit, but they're not hard to find, so just look around. As soon as you place the last item, a large port spawns in the center, and a boss-electrified mimic called Zips comes out of it.

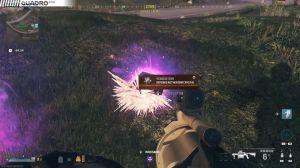
Zips is not too tough, but he can electrocute you. Again, if you feel your weapons are not up to the fight with him, place a sentry gun or two and just run around, avoiding his attacks. Sentry will take him down in about a minute. Once Zips is dead, the reward rift appears with a regular sigil inside.
You have now unlocked the second Rift, and the portal will spawn for you whenever you come up the hill. You do not have to go into the dark ether right away. The sigils are the same as those used for the Alpha Rift, and you can farm them from contracts in the red zone at any time you want. That's it for the unlock process.
The walk-through of the dark ether itself is a topic for another article. I hope this was helpful.