News - The Best Warzone 2 Settings. Aim Assist, Controller Deadzones & More
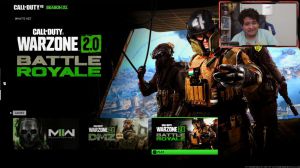
Intro

In the fast-paced world of War Zone 2, the difference between life and death can be as little as a few notches on a setting slider, so if you're looking to dominate the field out in our mazar, here are the best settings to go with.
Sensitivity
getting your sensitivity setting right is hugely important for any FPS, and it's all about finding that perfect balance between speed and precision.
Obviously, there's going to be a certain amount of personal preference here, but I find that setting both the horizontal and vertical stick sensitivity to six should put you right in the sweet spot.
Ads multiplier
shooting from the hip is all well and good when you're letting rip with an automatic weapon at close range, but you're also going to spend a good amount of time aiming down your sights to pull off those perfect head and upper chest shots.
To help you quickly make those little adjustments, setting the ad sensitivity multiplier to 0.85 should give you just the level of control that you're looking for. This makes it less sensitive than default, meaning precision can come all the more easily to you and help you pop heads with even greater accuracy.
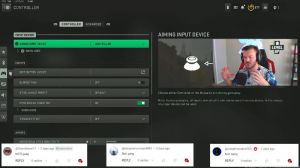
Aim assist

Warzone 2 also comes with a variety of aim assists that slow your aim down a little when you've got your crosshairs on an enemy, while the default option is perfectly fine.
Black Ops is the best one to go for slowing your aim down just a bit as you close in on your target to help you make those final micro adjustments.
Aim response curve
Getting into the slightly more technical stuff, the aim response curve options basically determine the relationship between what you're doing with the sticks and what you see on the screen.
With a standard response curve, the game will try to counteract any accidental movements that you might make by monitoring for unusually heavy input jerking, to the left or right, for instance, and then automatically doing an in-game movement in the opposite direction to keep the screen nice and stable.
If you're a bit of a klutz, then this might be worth trying. The linear option removes this monitoring entirely, meaning your inputs are exactly matched. This tends to be the winner once you've acclimatized. It is dynamic, which moves your aim faster the longer you push the stick, making it easier to move the camera around quickly and prevent anyone from sneaking up on you, but it also slows your aim back down towards the end of a given input or aiming down sights so that you can still shoot with precision.
Controller deadzone

As with the last war zone and with just about any FPS, the farther you can put your dead zones, the more deadly you'll be. The dead zone is the tiny area in which you can move the joystick without the game registering it as an input, so while turning them right down to wherever you feel comfortable might initially make things feel a little volatile, once you get used to it you'll find that you're aiming with an even greater degree of control and, at that point, the true dead zone will be wherever you go.
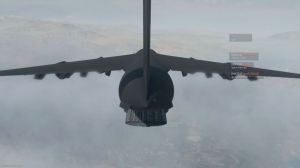
Parachute auto deploy
Like in many Battle Royale games, it's important to hit the ground running in War Zone 2. By picking a good point on the map to drop in at and then quickly setting about your business to help you get your boots on the ground even faster, you can turn off the parachute auto-deploy setting and pull the chord manually a little closer to the ground, cutting down on the amount of time you spend delicately floating down to earth. Just make sure you remember that you've turned it off; otherwise, you might end up hitting the ground faster than is tactically advisable.
Button layouts

You're crouching, sliding, and diving are all mapped to the right thumbstick, which means your thumb never has to leave it. You stay super mobile, but you can still pull off vital moves like dropping.
Auto tactical sprint
Auto, tactical sprint was all the rage back when slide canceling was a thing, but with that particular maneuver no longer available in Warzone 2, there's really no reason to have it turned on anymore. By turning this off, you retain the ability to move slowly and carefully when you want to be safe, in the knowledge that your tactical sprint is only ever a quick button press away.
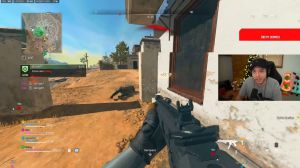
Quick button
Horizon 2 comes with a much more involved looting system than the original game, allowing you to carry extra items around in your backpack and even pinch the stuff being carted around by Fallen players, which is great, but obviously you don't want to spend ages deliberating over which bits of loot to take and which to leave, nor do you want to accidentally end up reloading when you're trying to grab something, so to make your looting quicker and easier. be sure to set the interact with real-life behavior option to prioritize interact with this setting, so that pressing the button once will grab any loot that's in Arm's Reach, allowing you to rapidly snatch stuff while holding it will allow you to reload.
Armor plate behavior

Lastly, our Majora is a pretty dangerous place to be, so you're going to want to keep yourself as well armored as possible.
The best way to do that is to set armor plate behavior to apply all, which allows you to replace all of your damaged armor plates with just a single button press rather than doing them all individually.
Outro
With these settings selected, you can consider yourself locked, loaded, and ready to win.