News - Dmz Guide - Boating And Entering - Unlock The Hazardous Blueprint

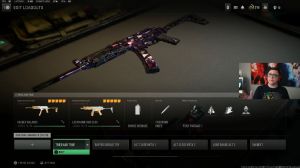
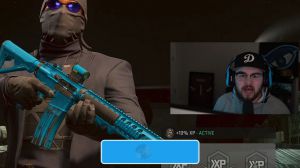
The final Tier 4 mission for Crown in the DMZ is the one that gives you the Hazardous blueprint; this is the M13 blueprint that we saw the chemist dropping in season one, but you could only ever get it as contraband, and it was kind of annoying because it's probably the best-looking blueprint. The mission to unlock it all isn't actually too bad; you just need to activate nine switches in the waterways underneath Sheikah Island in under three minutes and then go open an underwater case.
The tricky part of this is really finding those nine switches, and in this article, I'm going to show you exactly where they are. If you need a team to help you complete this mission, there are two juggernauts that you're going to have to consider: Using the sponsor link for today's article game It's an app that's been sponsoring us for a while now because I genuinely think it's an awesome way to find other people to play DMZ with.
You might have seen my article where I talked about the bunker in this; you are going to be going into that bunker as part of this mission, but yeah, you need to go to the waterways first of all, and I'd strongly suggest you don't just go plowing through there in a boat because there's lots of AI in there, including two juggernauts, so I'd strongly suggest the first thing you do is clear out all of that AI.

Just kill all of them. Kill the juggernauts. Once you do that, not many more AI spawn in; sometimes they're running from the entrances, but pretty rarely. You've cleared out all of the AI in there, and now you're going to have to find nine different switches. Now you're going to have to hit these in three minutes, and you can definitely do that solo, but obviously it's easier if there are more of you.
The way we did it, we had Flynn hit two of the switches solo. So I'll show you where all of the switches are now. If you go in where the beach club is at the kind of western entrance into the waterways, you've got this little alcove where there's some ammo, and here's the first switch just on the wall of this little alcove next to the gated off fence, so you can see on the map, it's just near that kind of western entrance.
For the second switch, you want to hop across the water to this little bit where there's kind of a ramp or some stairs down to the water's edge, and then you can find a switch here, but it's kind of in shadow and a little bit harder to see now. You can see me just as I looked over to the walkway it crosses over.

always thought of that as kind of the middle, and that's where a couple of juggernauts spawned, and that's kind of how we found out where we were going, but we had one person in each end of this, near each entrance to the waterways, so the next two that I'm going to show you are the ones that we normally had Flynn do, so one's in this little room just in the back corner.
of the room, and it's the only little room like this, so this one's kind of easy to find as well, so you can flick that one, and the next one is actually right near the Waterway entrance, a little bit further away than this little alcove. There's an alcove here where Flynn's just standing, but you go a little bit further than that and there's a column with the switch on the wall.

You can see it just down here, a little bit lower than some of the others, but this is near the north entrance to the waterways, so we normally have one person do the first two that we showed you and then one person do these two because they're so close together, and then those two people would run into the middle, and I'll show you this entire route now to get into the middle of where we had to go.
Like I said, it's easier before you start hitting any switches to clear out all of the AI in here. They don't seem to respawn very fast, and the juggernauts in particular could absolutely ruin you if you don't sort of pay attention to them. If you get both of them shooting at you at the same time, that would be a little bit of a nightmare, so if you keep running from this northern entrance, you can run over this tiny little walkway, and you can see there's the well entrance like the ropes that go up to the well, and then you can see this massive walkway that goes over the edge like I said; we see that as kind of the middle of this entire section.

So once the two people have done the two at the sides, then they can run to this one. Once you get to the bottom of these stairs, you need to kind of do a U-turn, and there's the neck switch, so one of the people who did any of the previous four can grab this one. It's right down by the water's edge, so just when you come off that big walkway and you can see here we haven't actually cleared out all of the AI, but if I just quickly skip ahead to where we have done it, then you go around the corner and the next switch is just on the little wooden dock that sticks out this kind of little wooden dock that sticks out there's, the next switch then.

For the next switch, you want to go all the way over to the collapsed bunker entrance that is the bunker that we're going to go in on the left, but there's another collapsed bunker entrance up here where all the scaffolding is, and the next switch is just on the left down here. Anyone who gets here first could do these ones because they're all kind of in the center, and then I'll show you the two that I would normally get, so if you just run around this corner, now we're heading out towards the other entrance to the waterways, and you can see the entrance out there; there's this little alcove on the left, and here's the next switch.
It's always above This duffel bag makes it kind of hard to interact with, but if you just keep sort of spamming interactive movements around, you should get the switch prompt, which would work for it, and then if you just hop over the water. See these sort of shelving units, and the switch is just to the right of them on this wall, so that's the last switch, and that's actually the first one that I would do by this kind of southern entrance, and then I would hit the last view and go up to the ones near the bunker, so that's where all of the nine switches are, and you can hit them by yourself if you want to; there's definitely plenty of time to do that or If you've got Free People, it makes it a little bit easier because each person can just take a handful of switches once.

If you've hit all nine within the three minutes, then the crate will actually be immediately pinged on a map for you, and to get to it, you go through this underwater tunnel, so it's just here. Watch out! There's a trip mine right near the entrance; you can just see it there; I'm diffusing it, and then there's another one a bit further in; it's super dark in here so quite hard to see you; you can diffuse it or you can just swim under them, but they will knock you down like they will take you down even if you've got blades.