News - White Lotus Faction Tier 3 Mission Guide For Warzone 2. 0 Dmz (dmz Tips & Tricks)
Intro

This is going to consist of seven total missions, five of which you will have to complete out of the six in order to unlock the final one, and then obviously that'll let you move on to tier four.
Fast and strong
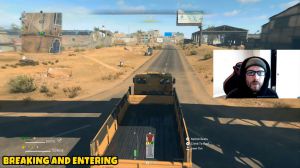
First, we have fast and strong This one is going to be a two-parter. Part one is not going to be as unfamiliar; for us, it's to unlock a stronghold door with a key card.
Part two, however, is going to be significantly more challenging because it's asking you to clear three straw strongholds, each within 15 seconds after unlocking the stronghold door, so you're going to want to be prepared before opening the door to actually clear it because 15 seconds goes much quicker than you think.
The good news with this guy is that once you open the door, there is actually a timer at the top of your screen letting you know how much time you have left to clear the space. You're going to want to go into your infill or scavenge your way to finding snapshots and drill charges. Once you've acquired these, you may even want to invest some money into some ignition boxes unless you have enough teammates.
Okay, go toward the stronghold; once you get to the outside of it, you're not going to want to unlock it. You're going to want to snapshot the outside, giving you the locations through the walls of where the enemies are. You want to drill and charge the walls, killing almost all of the enemies, but you are going to have to leave one enemy behind.
The one enemy left inside the strongholds you are going to unlock and rush. To that final enemy, eliminate them, and they will give you two views, one towards your progress and one towards completing the stronghold in under 15 seconds. This is by far the easiest strategy to clearing these in the time frame given, and you are of course going to have to complete three of these in order to finish this, Mission: Next up, we have Mallrat, and this one is kind of a pain.
Mall rat

It has two parts. Part one asks you to kill 20 enemies in the Syed City mall without being downed.
This is a lot more difficult than it seems because the enemies in this area can be fairly strong. You can actually make your way onto the roof and inside the mall from the roof without falling. Even needing a key, even though it might seem like you will need a key for this one once, you get up on the roof, and I recommend eliminating as many enemies as you can up there because there are going to be a few, and then peeking down inside and taking out as many enemies as you can without actually entering the mall.
That'll be your last resort, and we'll dive into the mall. You're going to want to work with a squad on this one because doing it solo will be extremely rough, and it'll obviously be easier if you have some other players who can kind of just help you eliminate those enemies without taking too much damage.
Part two is going to be much more frustrating; it's going to require you to kill three operators in the Syed City Mall. The good news is that you can actually be inside the mall or even in the parking garage. The parking garage doesn't need any access to a key, and sometimes, if you get lucky like I did, they might even put the x-fill right next to the parking garage, which makes it an easy place to camp, and you can almost always expect that somebody's going to try to axe Bill or that at least a couple of different enemies will end up in this area, real players to be exact. You'll be able to eliminate them once you've taken out three people in this area; you will obviously get this part completed, but it can be tough and rough to actually get these players to be in the area you need them to be next.
Air supremacy

Up we have Air Supremacy; this guy is a one-parter; it is definitely one I recommend going into it with a squad though because it's asking you to control three sites simultaneously.
If there's any confusion on what that means, it means you will have to have three of those at the exact same time, essentially. You're going to need to activate one, go right to the next one, activate that one, and you might be pushing for time to get to the third one, which is where your teammate will come in.
I chose to part ways with my Duo; he went to one site, and I went to the other once. We both got our sites completed; we met toward the third one, and then we activated the third one. Once that one was completed, we ended up having three of these activated at the exact same time.
Robin hood
Get this done.

Next up, we have Robin Hood. This guy's going to be a two-parter. Part one is asking you to open three safes and make one deployment. Now there is a very easy way to identify where the safes are without just randomly running across them. You're going to want to complete a destroy supplies contract; once you've done that, we'll actually show you some safes in the general area, but make sure you do this early in the match because sometimes I was activating the contract and completing it, and one or almost no safes were showing up.
Do it early enough, and you might get three to five saves, allowing you to go to the three safes you need and a fourth one if you're looking for additional money. Part two is going to be a little bit more challenging, though it's going to have you extract 100K. On a single teammate in one deployment, that means one of the players on your team will need to hold all of the cash in order to do this, and now getting 100K can be challenging, especially without a money glitch or something of that nature, but I will say if you were doing Part One, opening the safes, by the time I opened three safes.
I had a majority of the money I needed, and then I was able to just sell a few items to get the last bit that I needed to be over $100K, then you are obviously going to want to play it safe. For that x-factor, hopefully you'll have teammates with you; otherwise, it's going to be one of those challenges that can be quite frustrating. You're going to want to exfiltrate successfully with the hundred thousand, and you'll get Part 2 complete.
Medical mule

Next up, we have a medical mule. This guy is going to be a three-parter; part one is asking you to deliver 20 stems to the dumpster at Dead Drop Northeast, of all places, at Shamam Cemetery.
So if you guys don't know where the dead drop is, I'll obviously include that location in the article, but you're going to need to deliver 20 stems. If you have a large backpack, you will be able to fill it with as many stems as possible. The strategy here is to get up enough money to where you can buy quite a few Munitions boxes and have a teammate that's also doing the same with you.