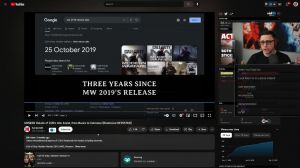
News - Floatys Revenge 8. 0 Setup Guide. Cronus Zen Best Warzone 2 Script Tutorials
Nadia, Assist is the same aim assist from Nadia's shot or Nadia's aim script, sorry. You can just turn it. I like having it. It works very well. The next small thing you see is a headshot assist. You can click X to adjust this. I keep it like this. Keep it like this, but it's very good. Press Circle now this is the most complex aim-assist part.

And sorry, the first thing you will see should be Amos's V2. Now, when you see Amos's V2, you're going to click X. You will see Amos's speed and radius. And that's it. You're going to set the value that I put on the spreadsheet for these two values right over here. We're going to press Circle, and you're going to press the down d-pad.
The next thing you will see is me say "polar." All right, you want to make sure you match what I wrote in the spreadsheet, so "polar," then you're going to press a down d-pad and you're going to see the shape, which we'll say "zen." Now I'm just hoping that's visible because it looks very blurry, but let's zoom in a little more, a bit more, and hopefully it's a little bit better quality.
Yeah, it looks like you can read it, but you can definitely read it. The next person you see is Zen. Okay, so these are Amos's shapes now. If you guys do want to adjust from polar to linear or disabled, you can press the right d-pad and write your left d-pad all mixed. Whatever you want, Polar is the best, though when you go down for Amos's shapes If you want to adjust your posture, click on the right or left knee pad.

All right, these are all the shapes, and we will have the spreadsheet for all the shapes finished very soon. Okay, once you select the shape, you're going to keep going down until you see boost on fire. When you see Boost on Fire, you're going to click X or a to edit. Now you'll see it over here when you press the down d-pad.
You'll see boost strength one down deep at on fire strength on fire speed, and those are the balances through the strength. Now you want to copy what I put on the spreadsheet, man. I've written it; I write "boost speed 1" and I put a number "boost strength 1" on, "fire strength" and then a number, so you obviously want to match another, and to match, you hold L2 and the right or left d-pad, okay?
then you press Circle, If you press the down d-pad, boost reduction will be off right now. If you feel like it's very, how can I say very, laggy with your aim assist, you can turn on boost reduction. It helps a little bit now that you've gone down here; you'll see TD Assist version two. You want Aim Assist Version 6 and on.

You can press the right and left d-pads, sorry, and go to V5 speed boost, but V6 is the best. Over here, you're going to click X, and then there'll be more value and speed. TD angle and TD radius, and these are the three values, and I put these values on the spreadsheet again so you'll see them. You just need to keep following along step by step, so press Ads Speed 10, go down deep at TD Angle 10, and whatever it says is okay, so you copy that, press Circle.
Go down one more time; you'll see that it's linear and there's nothing adjustable; then you'll go down again. You'll see the next shape, so this is shape number two. The tall oval is the best shape for the tall in shape number two; it just does the best. Okay, now you press the down d-pad again, you'll see Shape Direction, and you turn that on.

It is a little bit confusing because there are so many adjustables, but these adjustables can make a big difference for your aim assist once you're done with the Zen assist, the circle, and you press down now. I'm going to show you how to set up advanced anti-vehicle technology right now. This comes from my intermediate and advanced components and users.
You're going to turn on Advanced AR with the right d-pad over here, you're going to click X, and you'll see primary: start pressing the down d-pad primary, end the down d-pad primary, time down deep at horizontal and horizontal time, okay then for the secondary to the same saw all right aort means anatomic secondary; secondary primary means your primary; okay now.
I'll put the values always in order so when you see the numbers there'll be maybe something like 30 commas, 35 commas, and 100 commas. 30 comma 30. That's one value, so you'll see it. You just literally put the first value into the first slot, pressed the down d-pad, the second vowel, and the second slot.

So now we're on solid ground. This is very good for beginner users because you cannot change your ground load value by pressing triangle. Now if you're an advanced user and you want to get the anti-bias a little bit locked in, you hold L2 and press the left d-pad to turn on Load loadout mode. Okay, and as you can see, green is for your primary, and purpose is for your secondary.
Okay, so primary and secondary are all right, and all you're going to do, man, is just play with your war zone when you pick up your loadout. You hold out two left d-pads for your loadout mode, and then you can play like that now. If you want to go back to ground loot, you hold L2 and press the right D5, all right, and that's pretty much it when it comes down to the tutorial.
It should already be posted tonight, so make sure you guys check that out. Take care if you have any questions, please leave them below.